Overview
Evergreen Sequences automatically send emails to new leads as they get added to your list, without needing to manually restart campaigns every time. This is perfect for continuous outreach where your lead list keeps growing.
Prerequisites
Connected email sender
A lead list or CRM integration set up
When to Use Evergreen Sequences
Use Evergreen Sequences when:
You are continuously adding leads (via integrations, forms, or imports)
You want automation running 24/7
You don't want to manually re-run campaigns
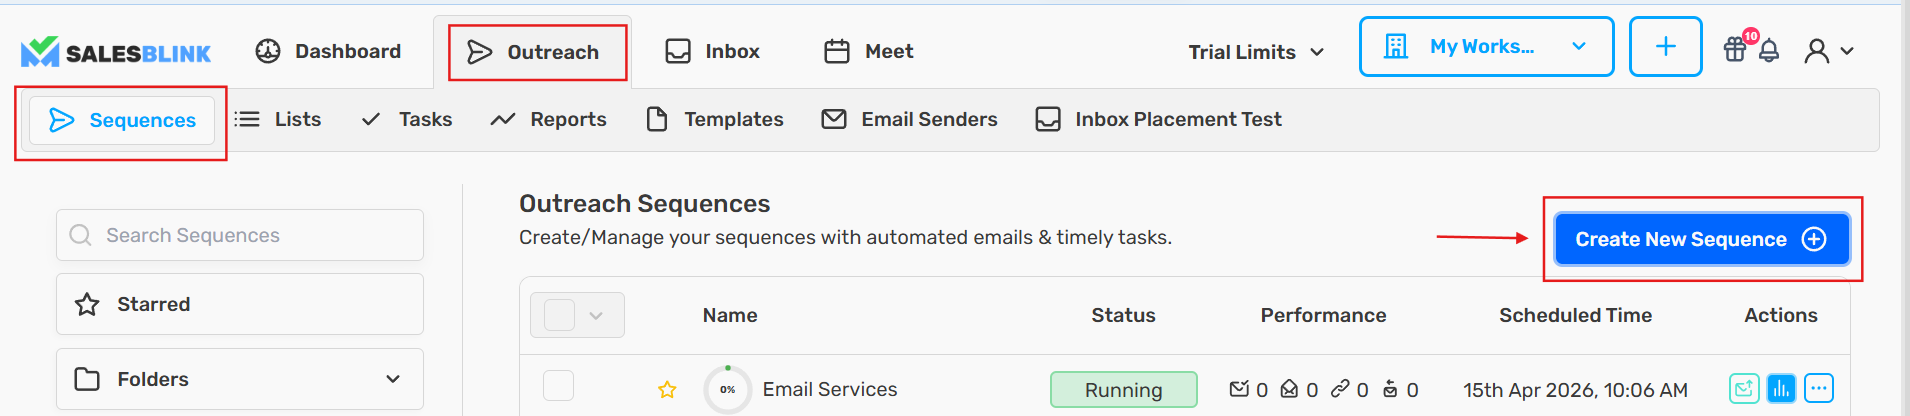
Step 1: Go to Sequences
Go to Outreach
Click on Sequences
Click Create New Sequence
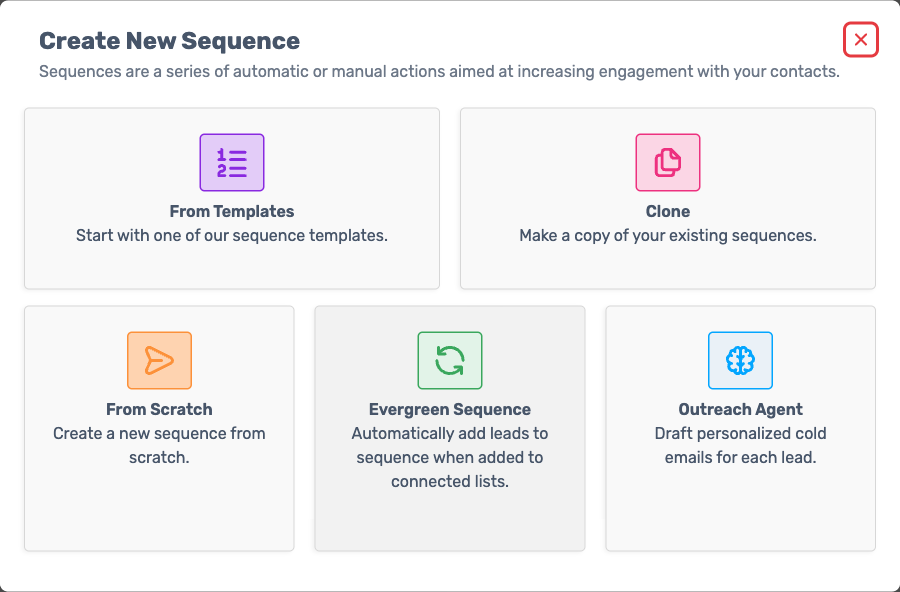
Step 2: Create an Evergreen sequence
- Choose the Evergreen Sequence card ("Automatically add leads to sequence when added to connected lists.")
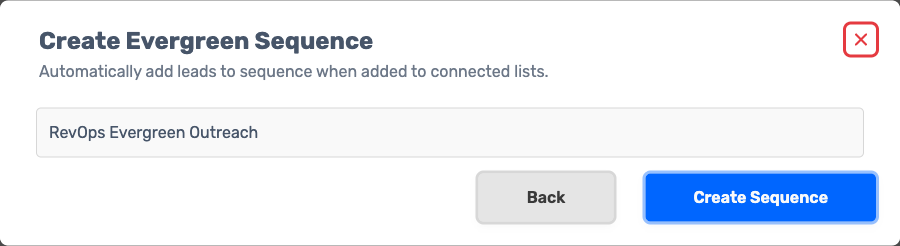
Enter a name for your sequence
Click Create Sequence
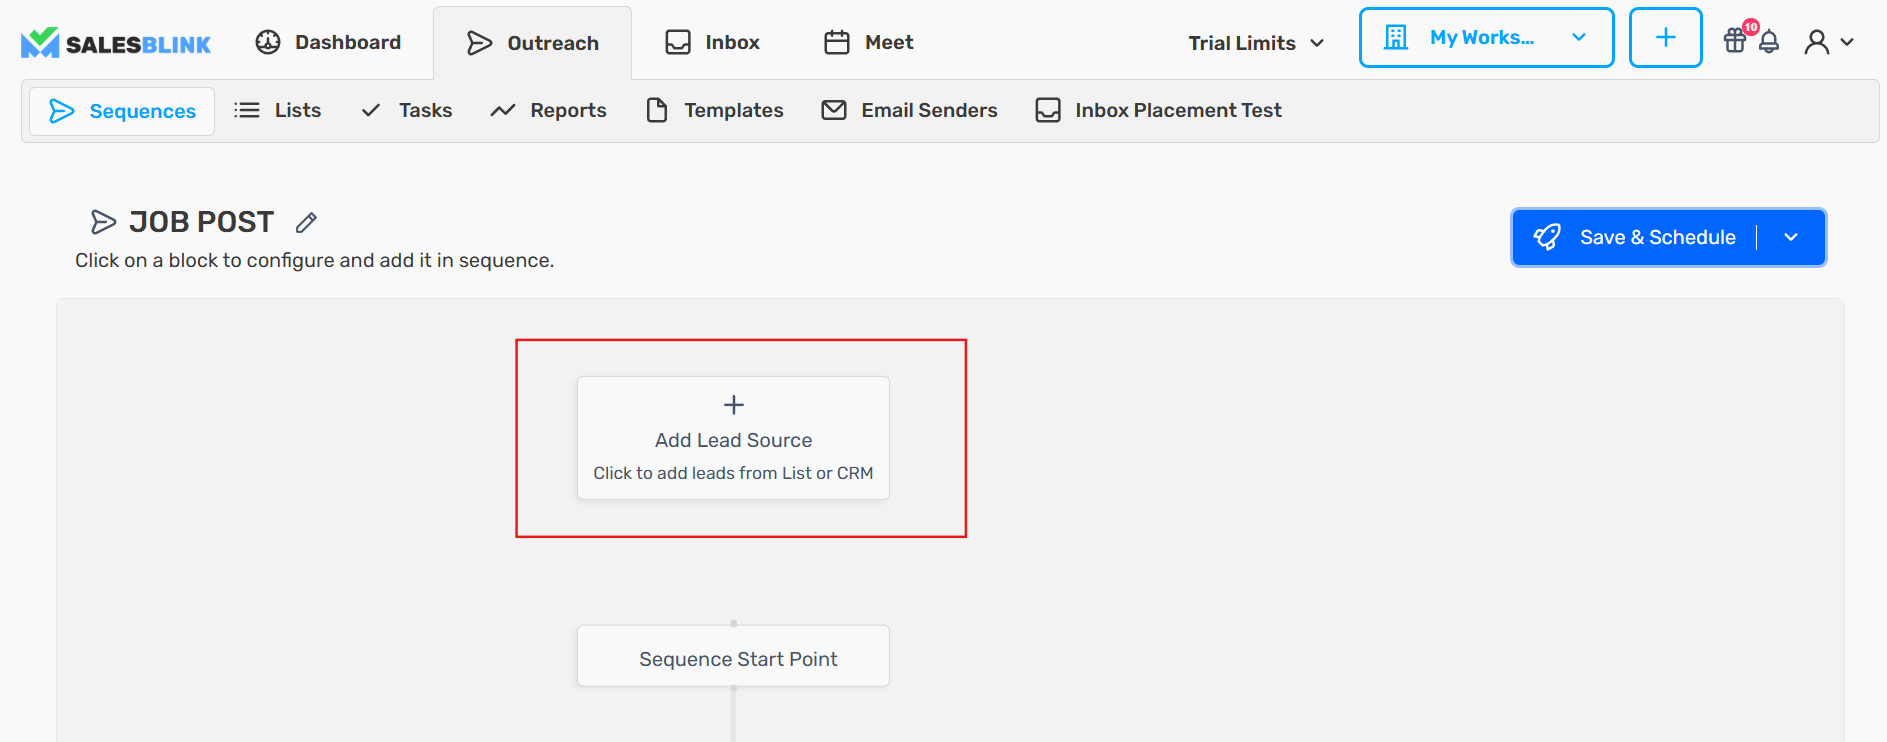
Step 3: Add Lead Source
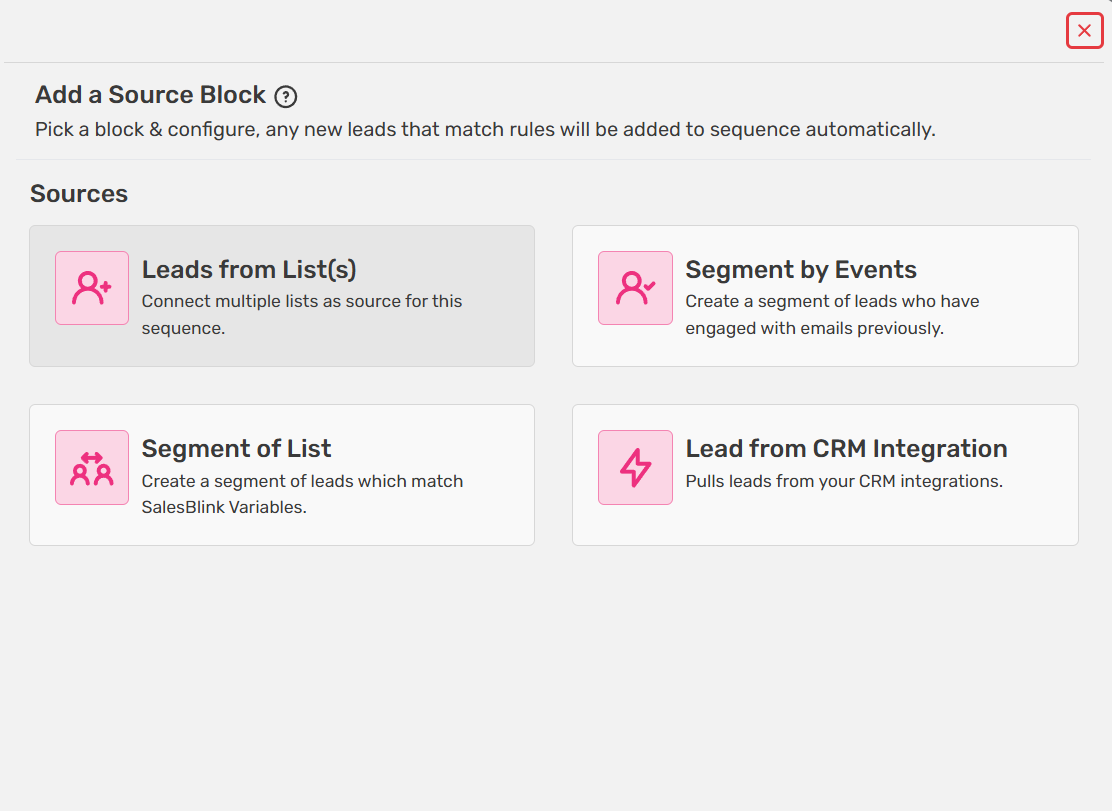
- Click Add Lead Source
- Choose a source:
Leads from List(s)
Segment by Events
Segment of List
CRM Integration
Example:
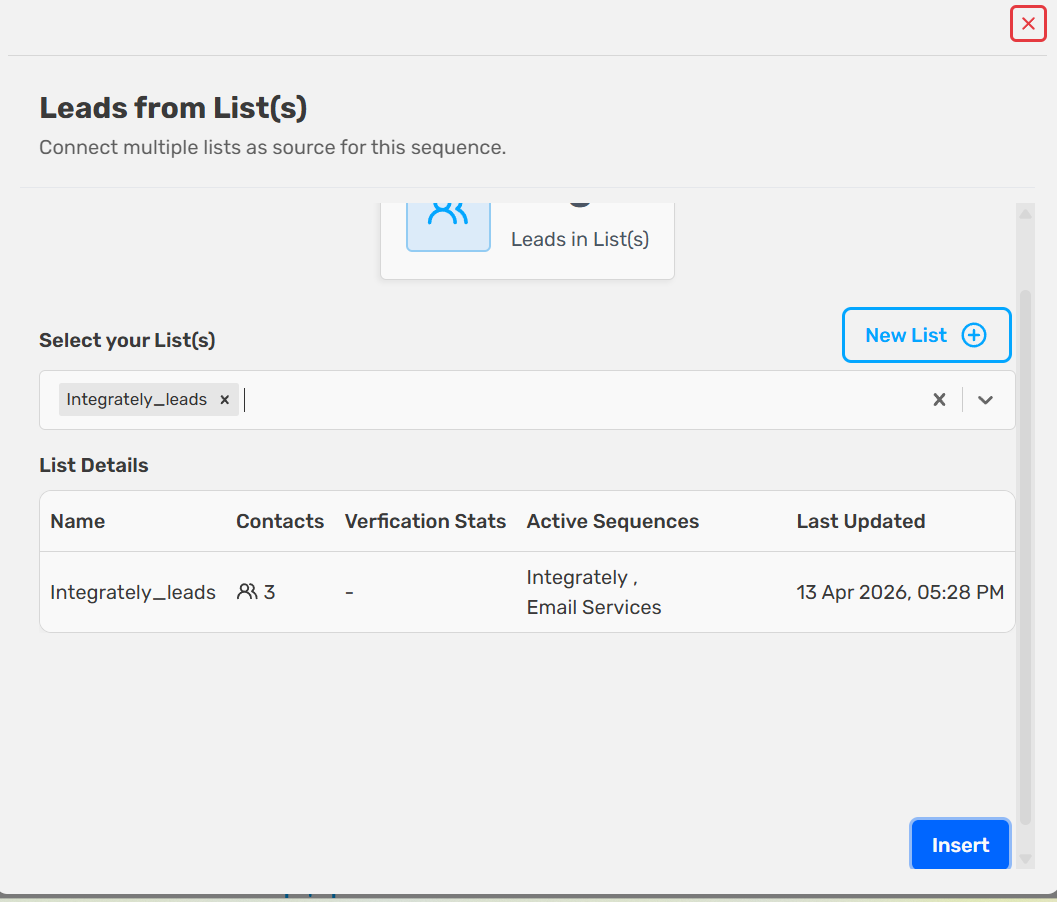
Select Leads from List(s)
Choose your list (e.g., Integrately_leads)
Click Insert
Step 4: Add Outreach Step (Cold Email)
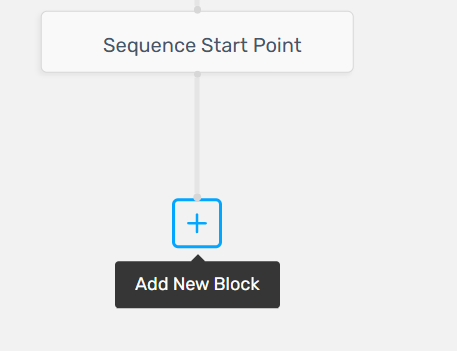
- Click Add New Block (+)
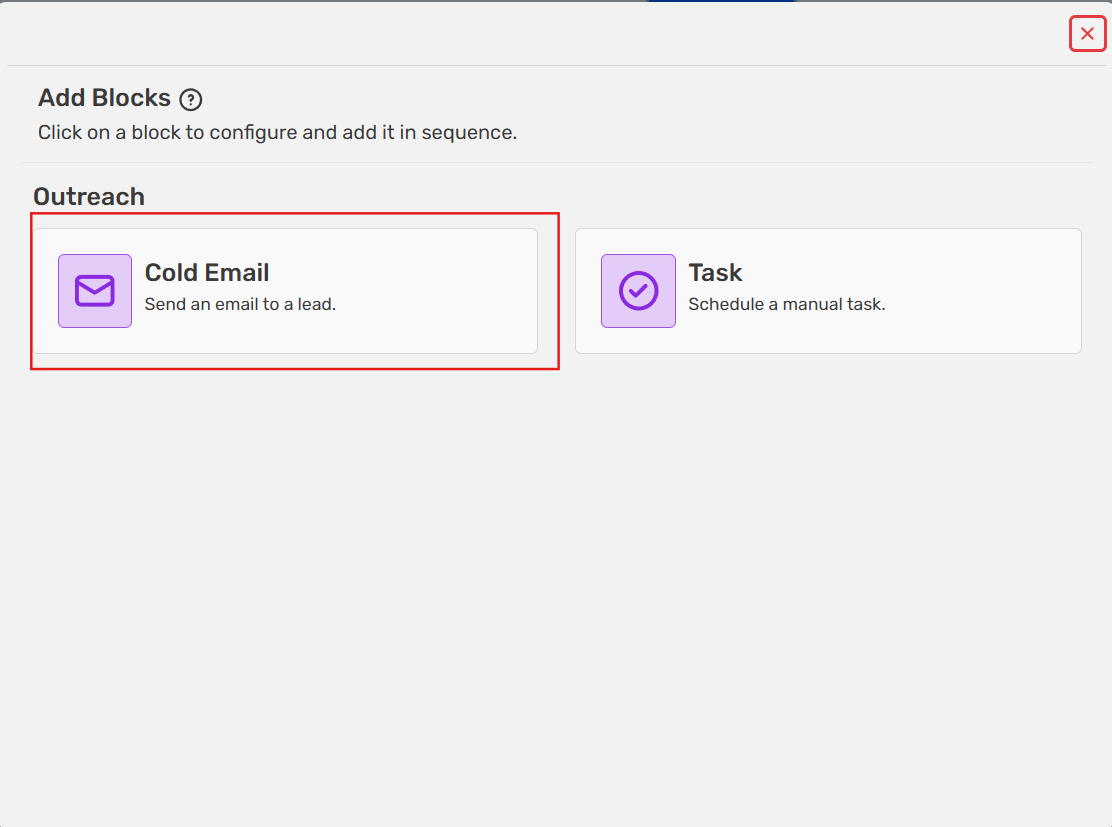
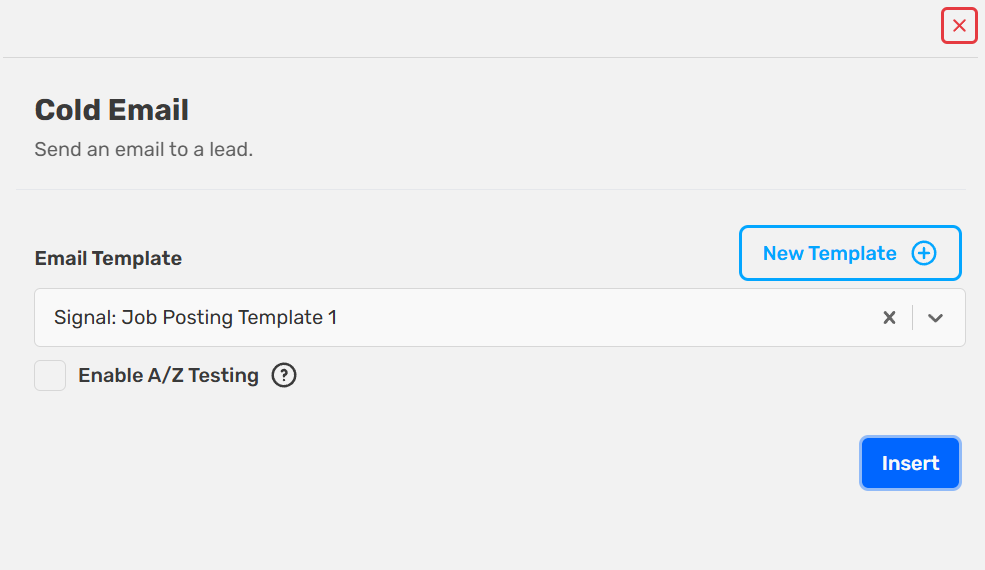
- Select Cold Email
- Choose or create an email template
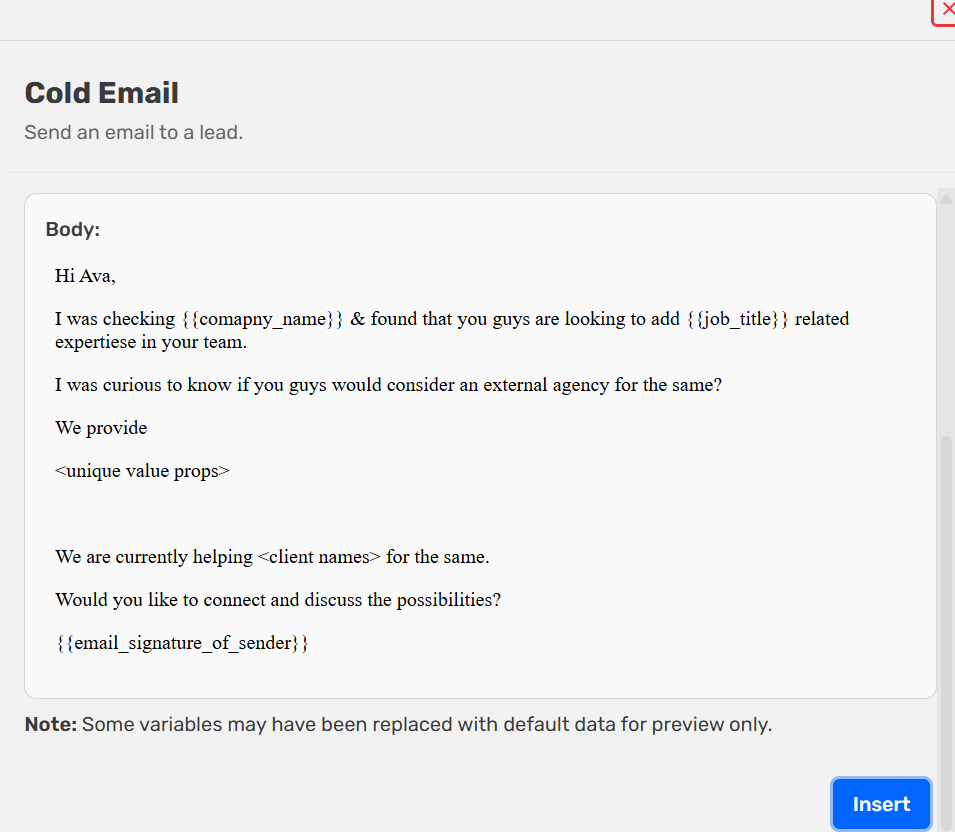
You can use variables like:
{{company_name}}{{job_title}}{{email_signature_of_sender}}
- Click Insert once done
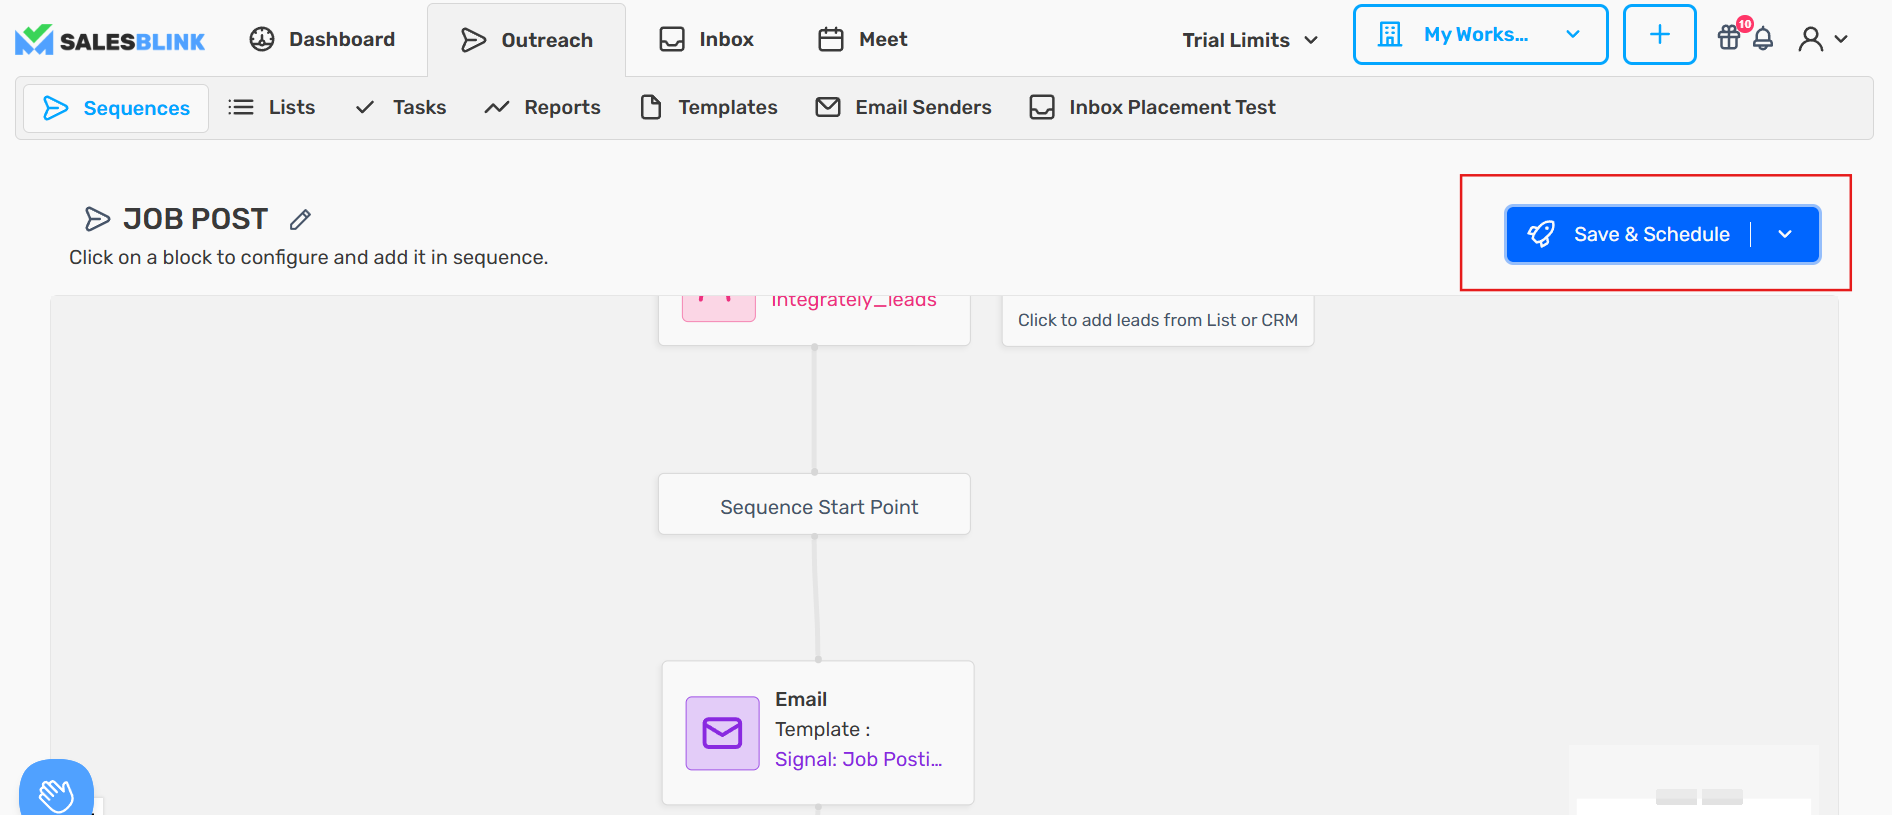
Step 5: Save & Schedule
- Click Save & Schedule to configure sending settings
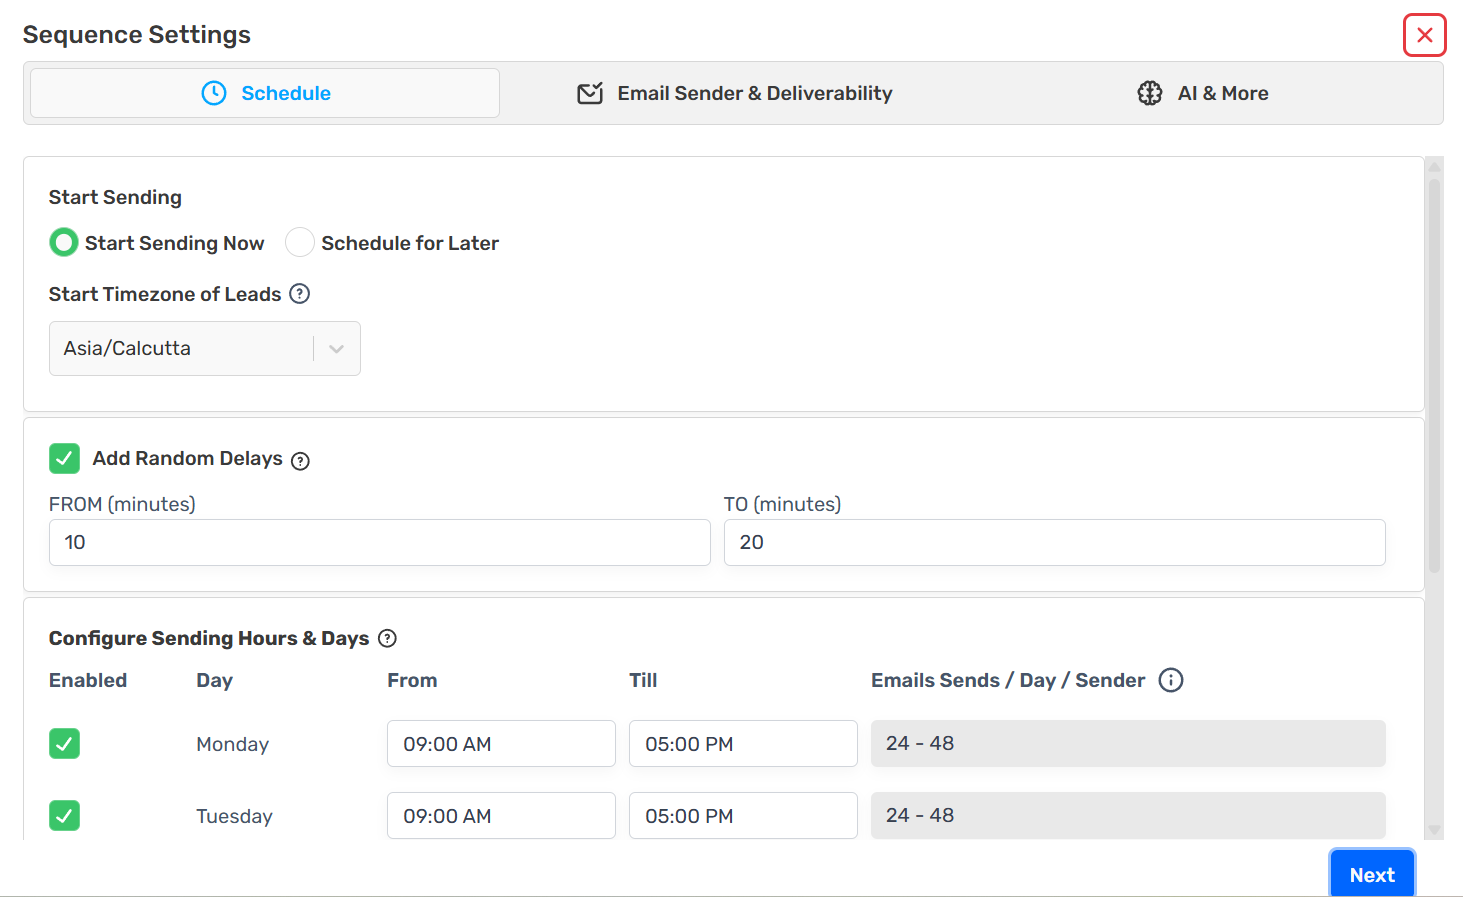
Step 6: Configure Schedule
- Choose:
Start Sending Now or Schedule for Later
Set timezone
Add random delays (recommended for better deliverability)
Configure sending days & time
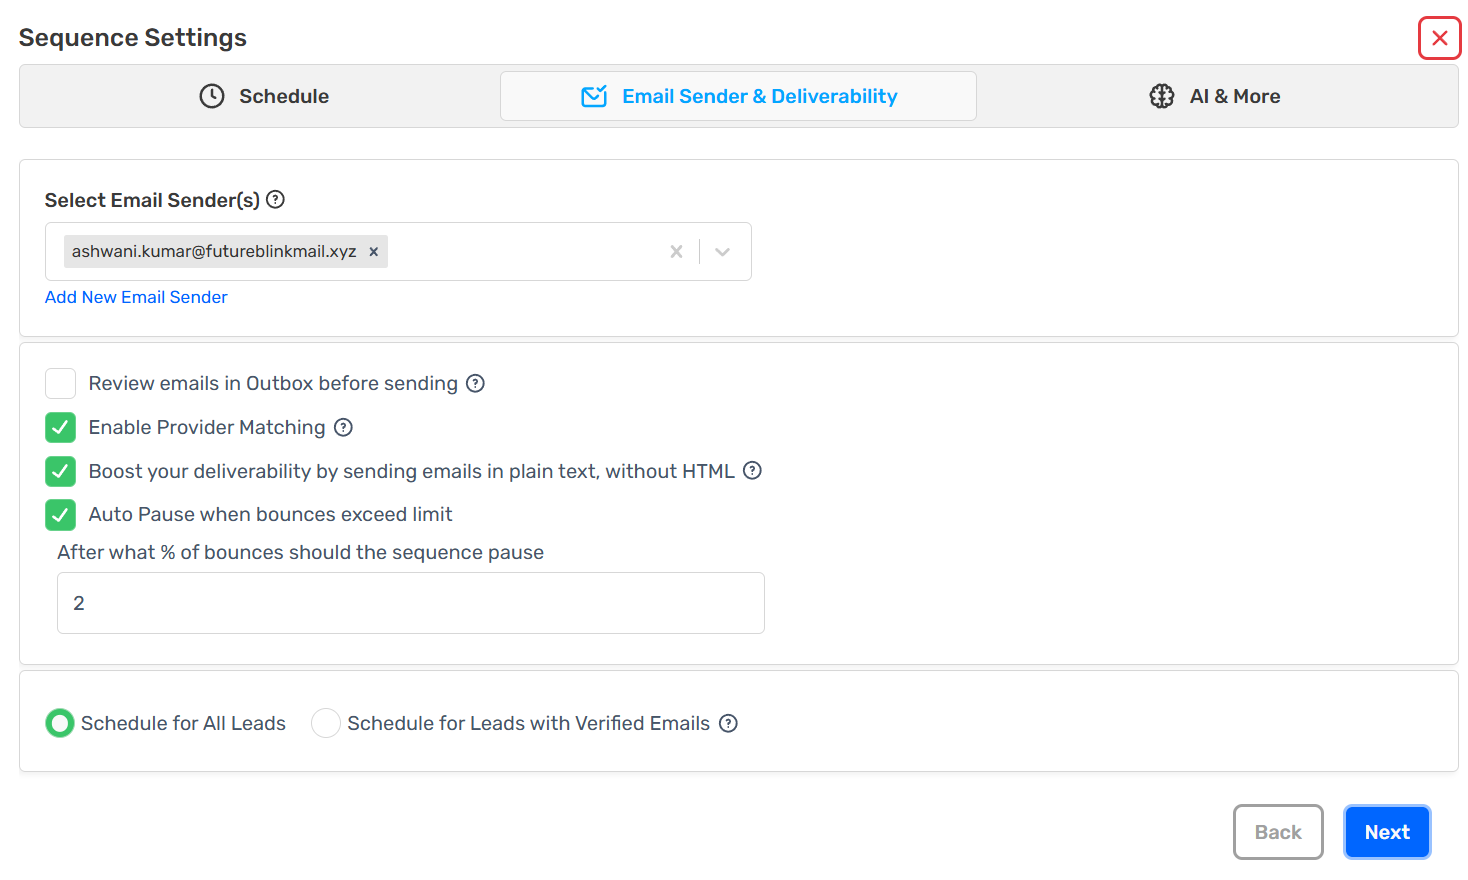
Step 7: Email Sender & Deliverability
Select your email sender
Enable:
Provider Matching
Plain text emails (recommended)
Auto pause on high bounce rate
Step 8: Check the Evergreen Sequence setting
- Open the AI & More tab and make sure Evergreen Sequence is ticked.
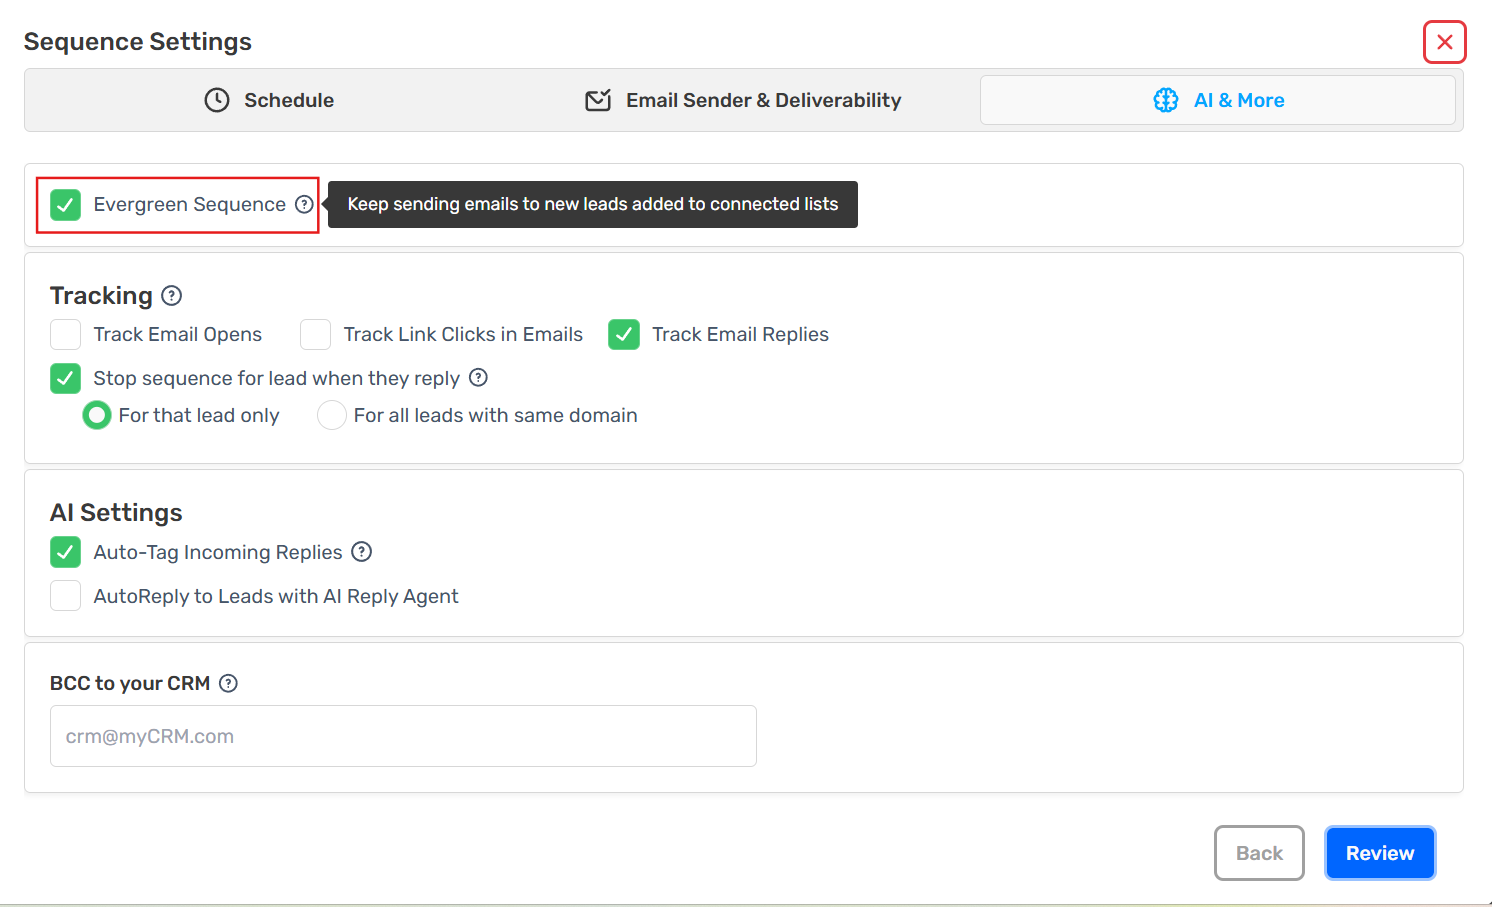
This keeps sending emails to new leads added to your connected lists.
Note: Sequences created from the Evergreen Sequence card have this setting on, and it can't be turned off ("Evergreen cannot be disabled for an Evergreen sequence."). For other sequences, you can only change it before the sequence is scheduled.
Also configure:
Tracking (opens, clicks, replies)
Stop sequence when lead replies
AI reply settings (optional)
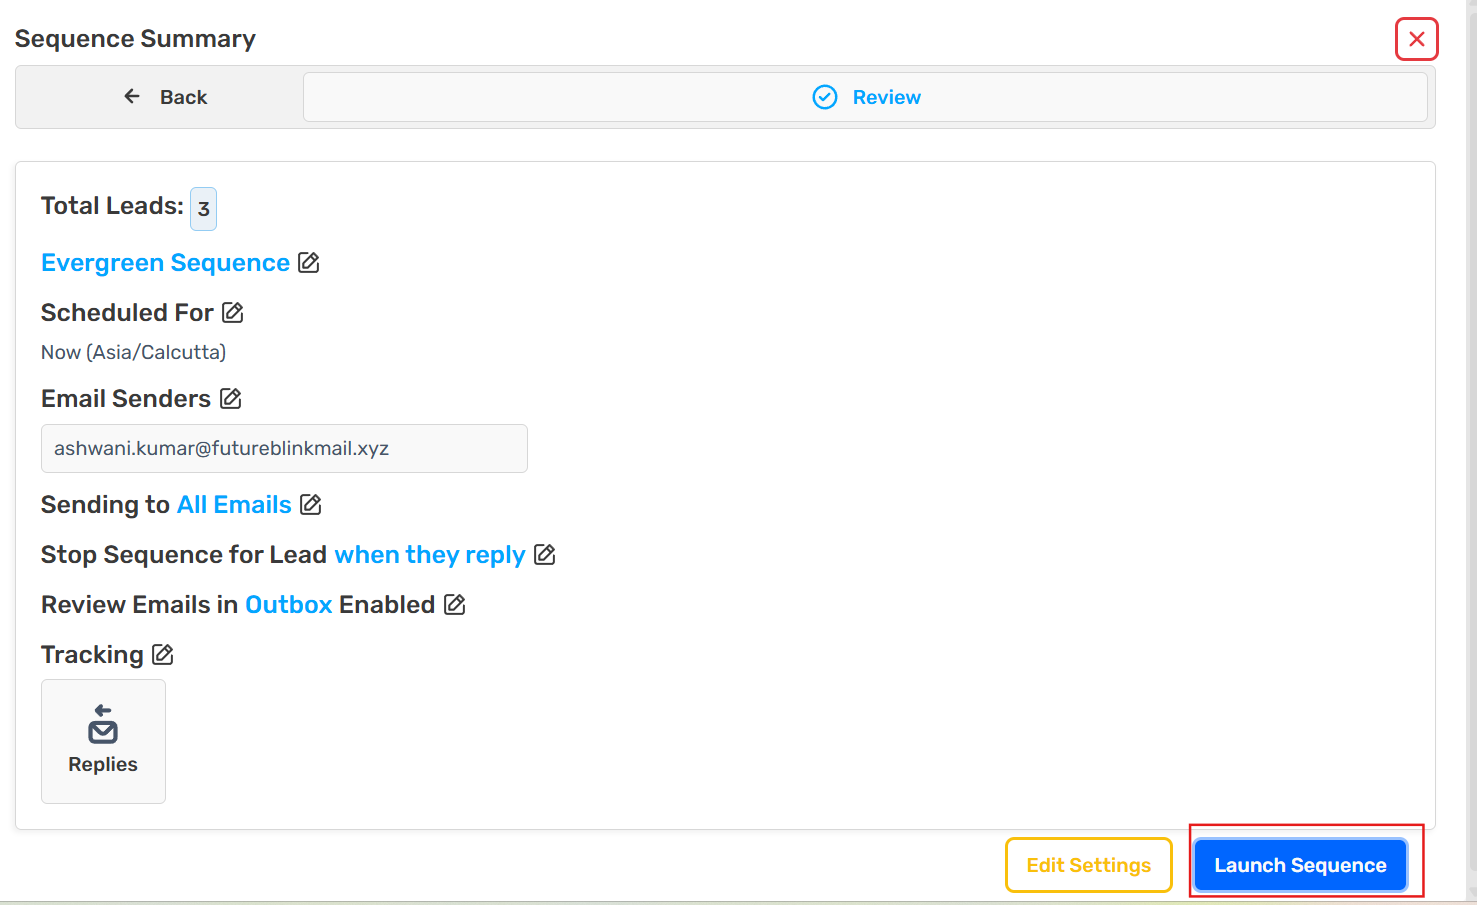
Step 9: Review & Launch
Review your sequence settings
Click Launch Sequence
How Evergreen Sequences Work
Once enabled:
You connect a list as a source
Whenever a new lead is added to that list, the sequence picks it up automatically
When the lead is picked up depends on the list settings:
| List setting | When the new lead enters the sequence |
|---|---|
| No duplicate removal or verification | Right away |
| Duplicate removal on | After duplicate removal runs (about every 10 minutes) |
| Email verification on | After the lead is verified |
| Google Sheet list | At the daily sync |
No need to re-run or duplicate campaigns.
Important Notes
Evergreen works only with connected lead sources (lists/CRM)
If you manually upload leads later → they will also enter the sequence
Sequence runs individually per lead
Paused sequences don't pick up new leads
A lead (by email address) enters a sequence only once
Move Lead to List into an evergreen list follows the same rules: duplicate removal and verification run first if the list has them on
Best Practices
Use verified email lists
Keep random delays ON to avoid spam filters
Write personalized emails with variables
Always enable:
Reply tracking
Stop on reply
Results
After setup:
Your outreach becomes fully automated
New leads are picked up automatically, based on your list settings
You save time and scale outreach easily