Overview
Connect SalesBlink with Zapier to automate your sales outreach workflows. With this integration, you can trigger actions in other apps when events happen in SalesBlink, or add leads to SalesBlink from external sources.
Prerequisites
Zapier account
SalesBlink API key
Available Triggers
Triggers are events in SalesBlink that start your Zap:
New Link Click: When a link in an email is clicked
New Reply: When an email receives a reply
New Email Opened: When an email is opened
Available Actions
Actions are tasks that SalesBlink performs in response to a trigger:
- Add Lead to List: Add a new lead to a specific list
Step 1: Generate API Key in SalesBlink
- Click on your Profile icon and select My Profile
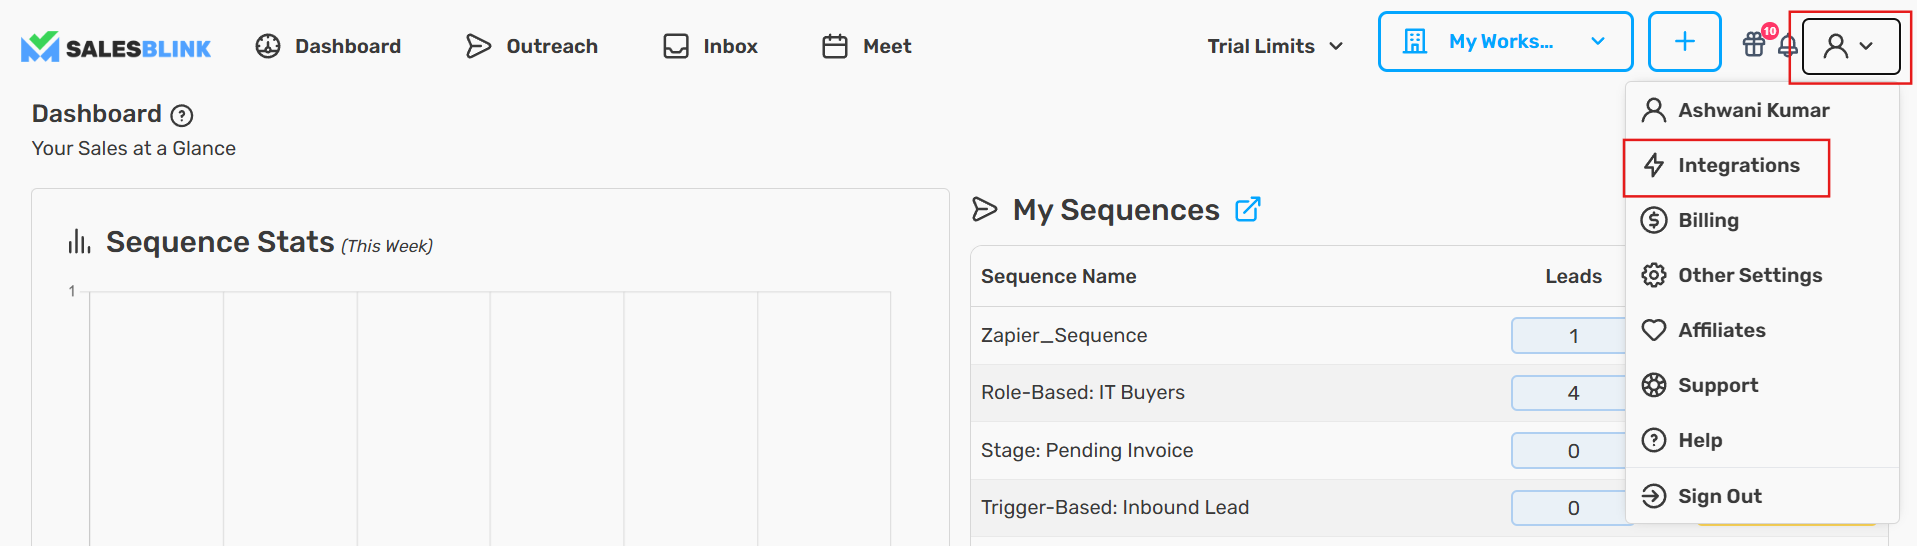
- Navigate to Integrations → API
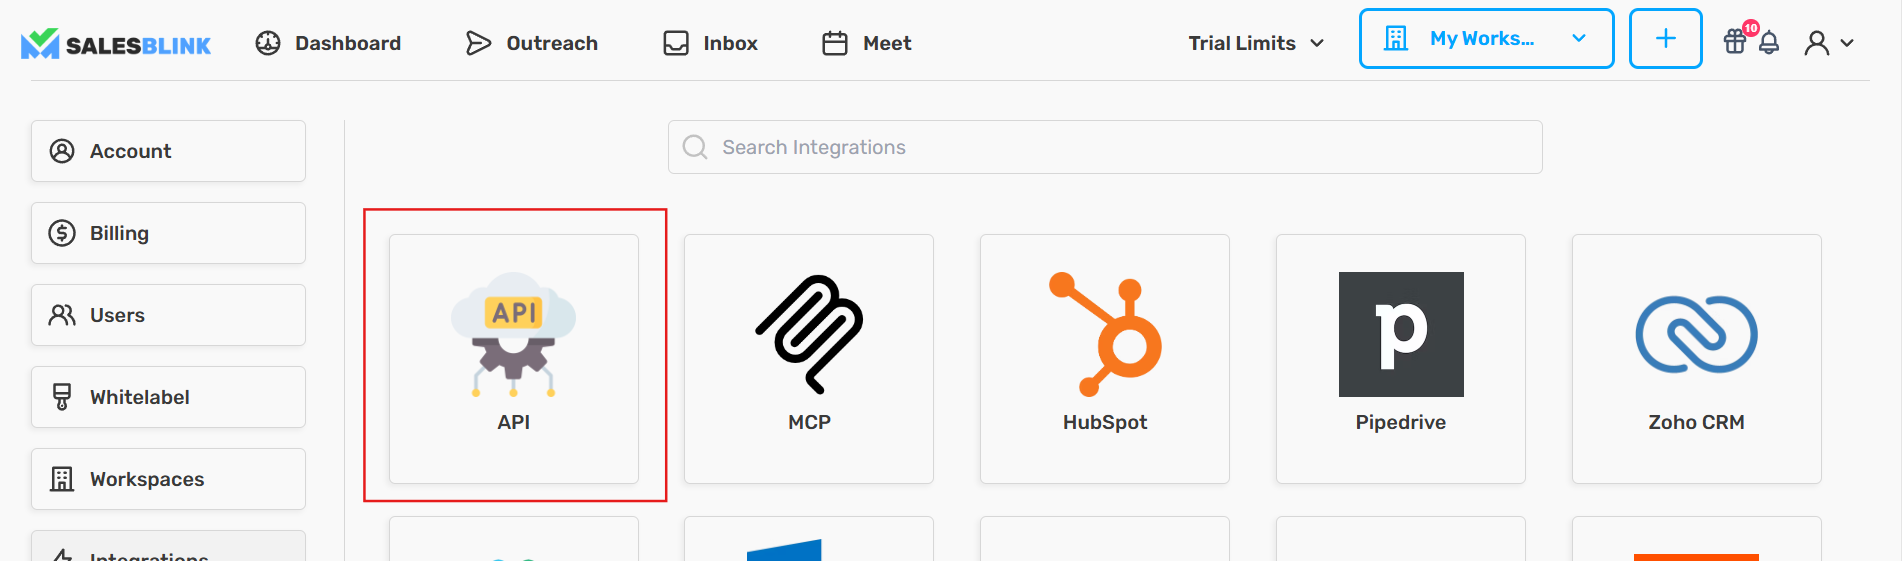
- Click Create API Key
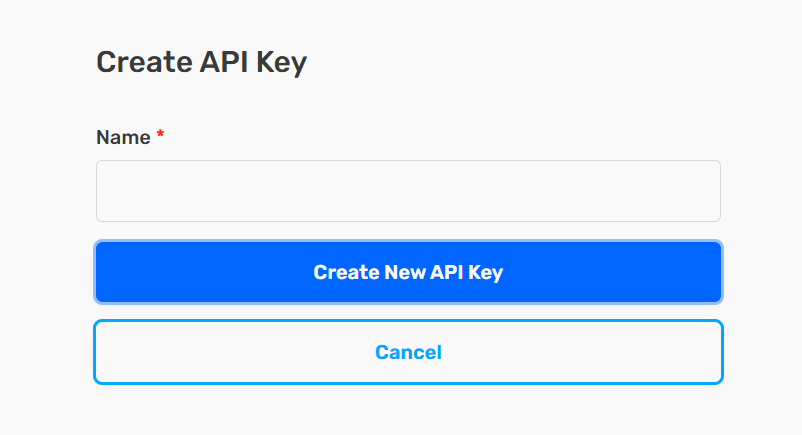
Enter a name for your API key (e.g., "Zapier Integration")
Click Create New API Key
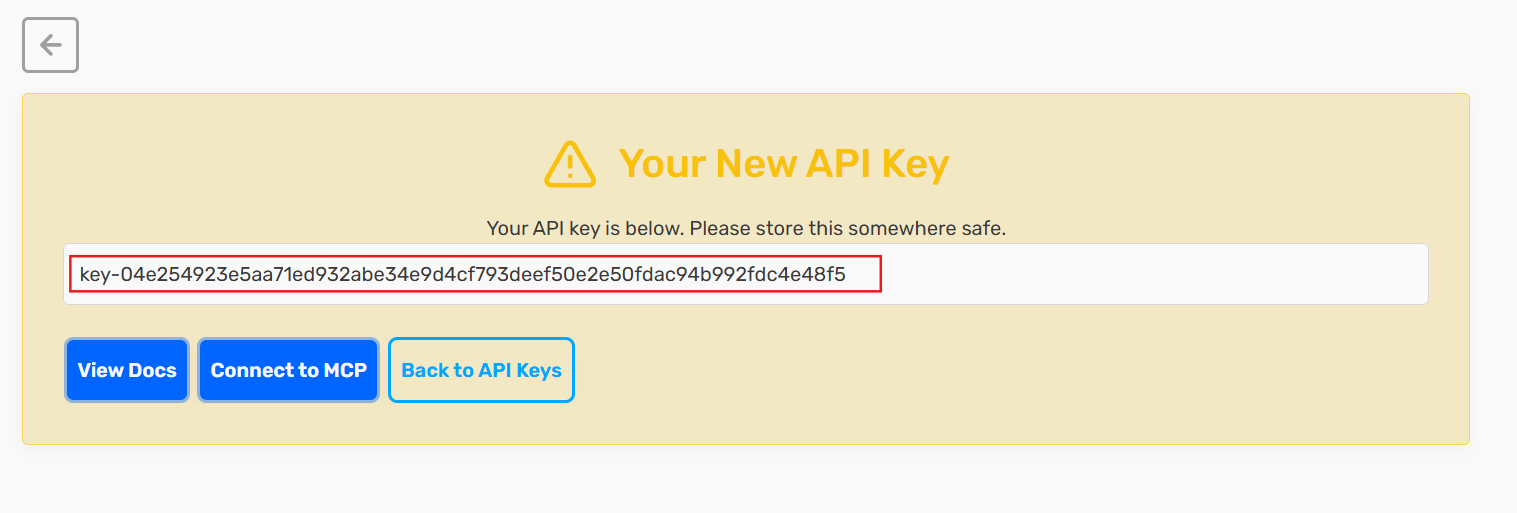
Note: Copy and store this key somewhere safe. You can view it again later with the eye icon in the API keys list.
Step 2: Create Zap in Zapier
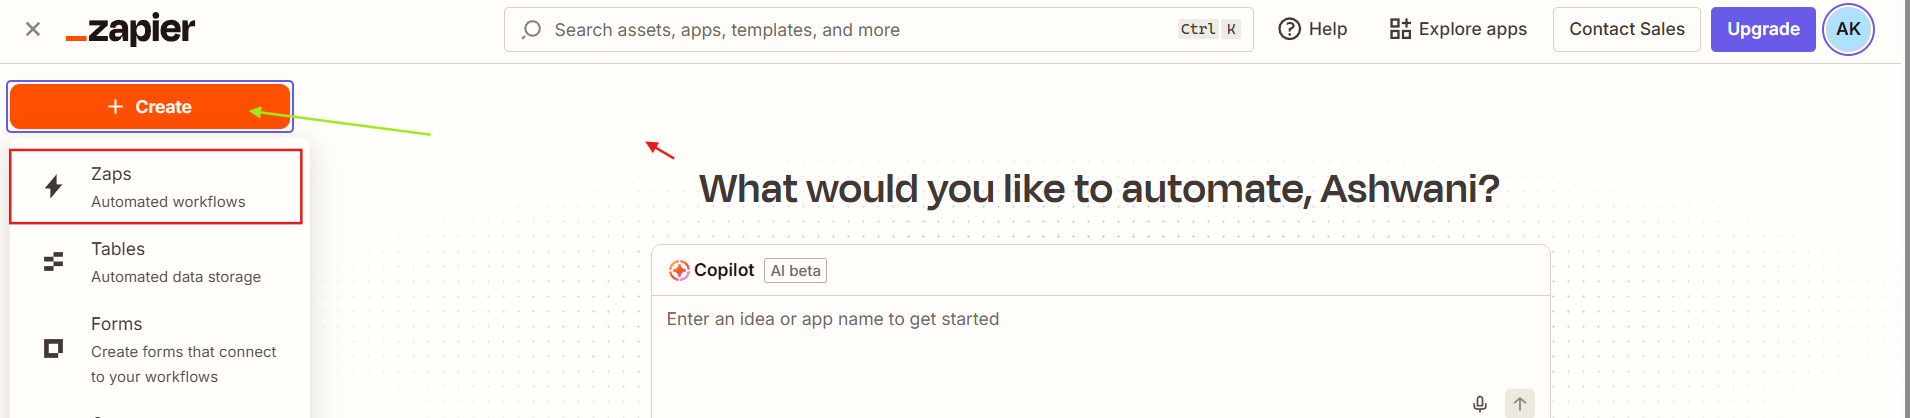
- Go to Zapier and click Create Zap
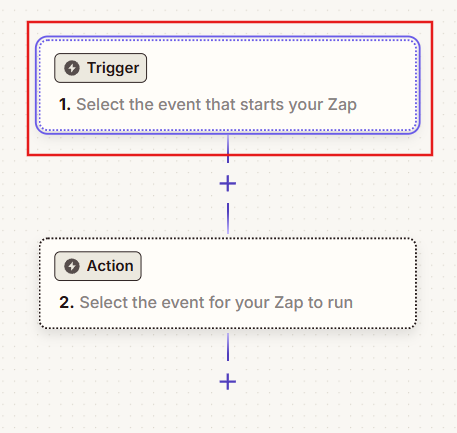
- Choose your Trigger App (the app that will trigger the Zap)
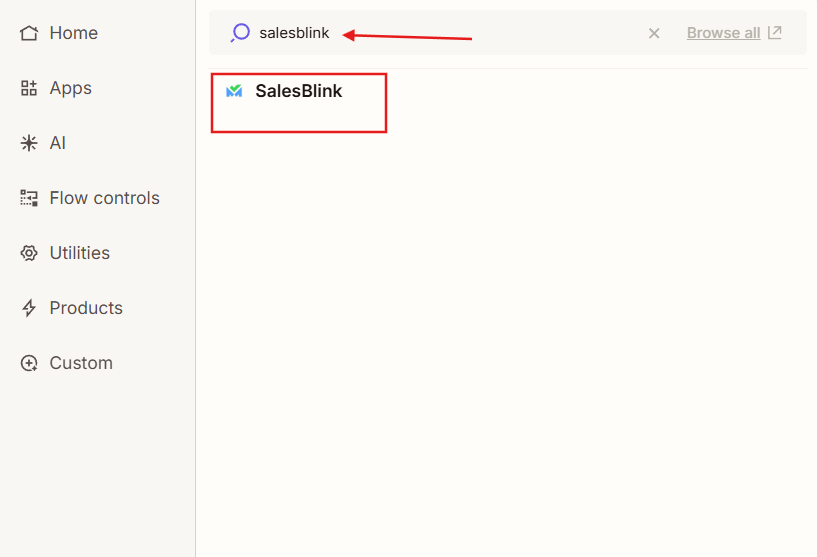
- Search for and select SalesBlink if using it as the trigger
Step 3: Select Trigger Event
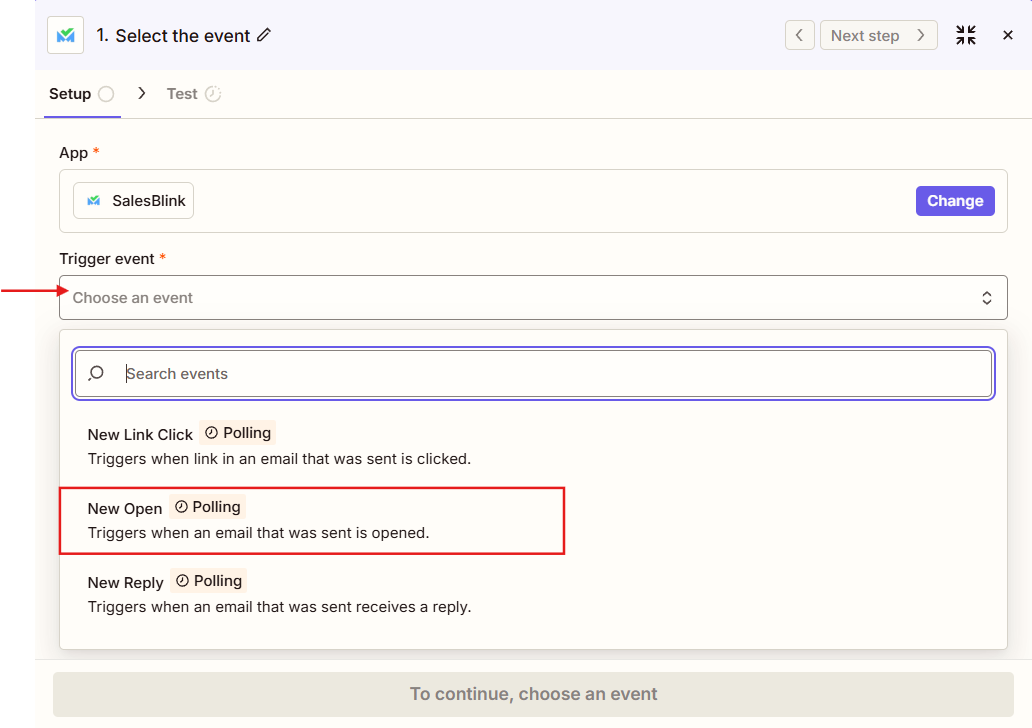
- Select the Trigger Event from the dropdown:
New Link Click
New Reply
New Email Opened
- Click Continue
Step 4: Connect SalesBlink Account
- Click Sign In or Add Account
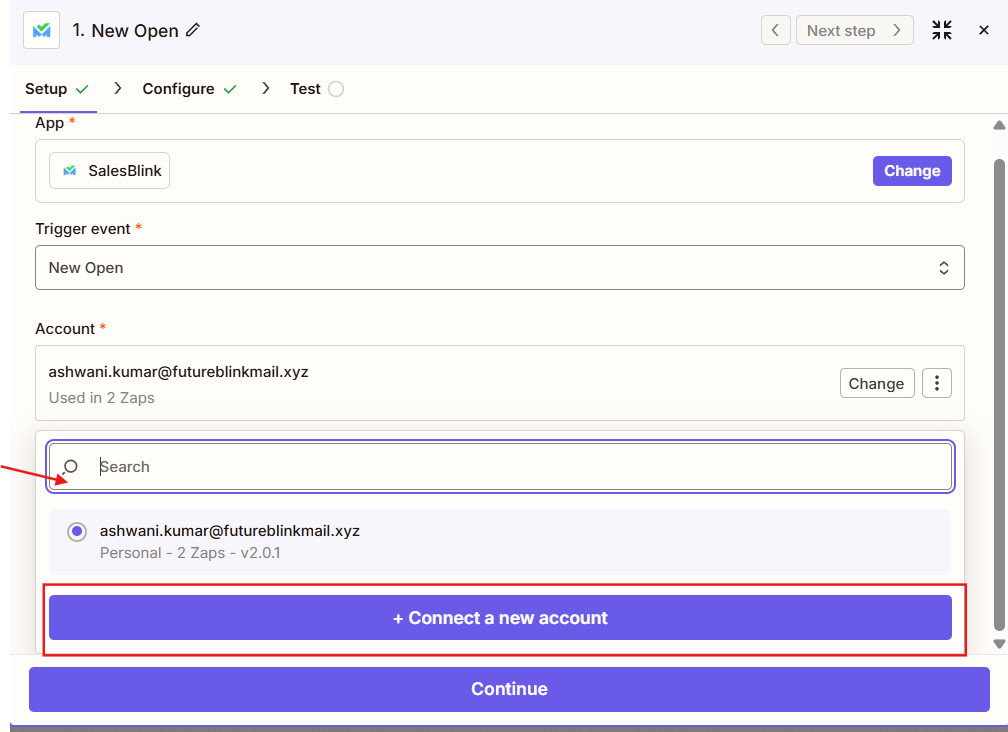
Enter your SalesBlink API Key in the field
Click Yes, Continue to authorize
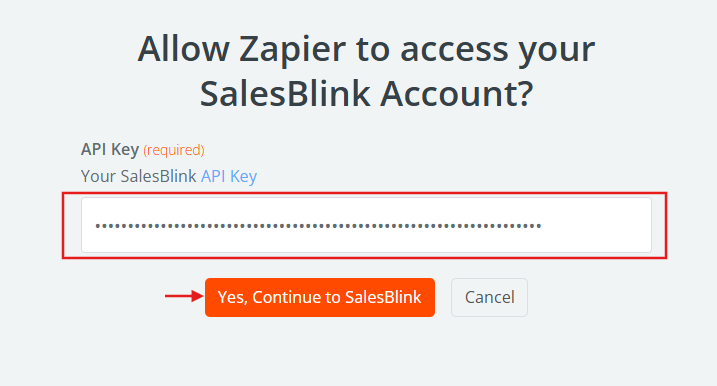
Your SalesBlink account is now connected to Zapier!
Step 5: Configure Trigger
(Optional) Enter Sequence ID to filter by specific sequence
(Optional) Enter Recipient Email Address to filter by specific recipient
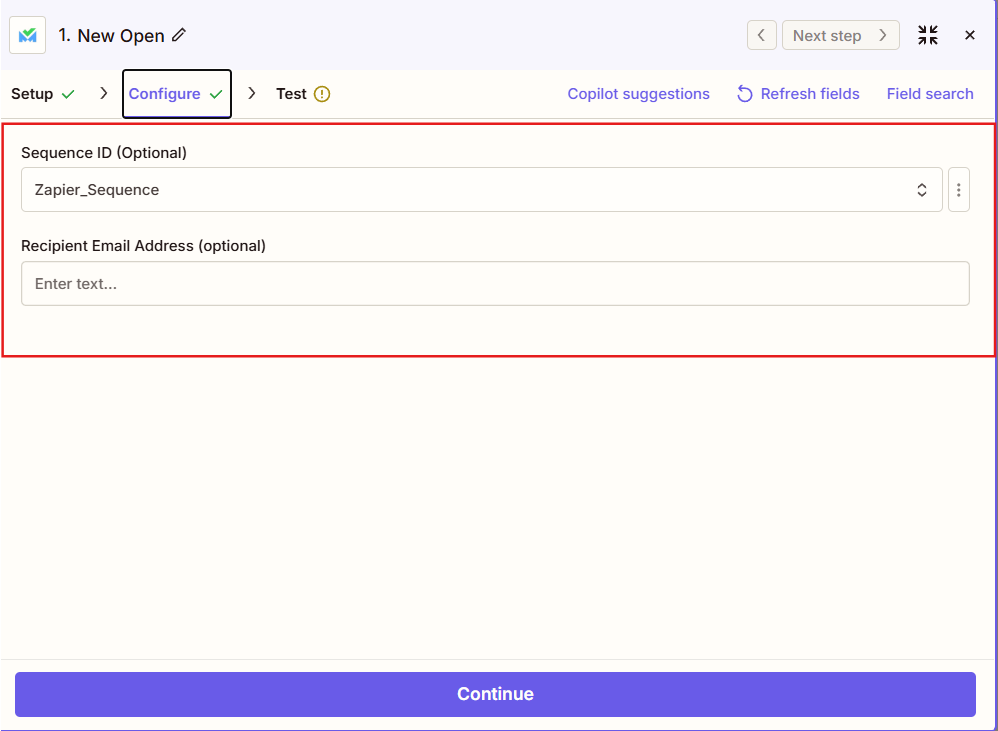
- Click Continue
Step 6: Add Action
Example: Add Lead to List when an email is opened
Click the + icon to add an action
Search for and select SalesBlink as the action app
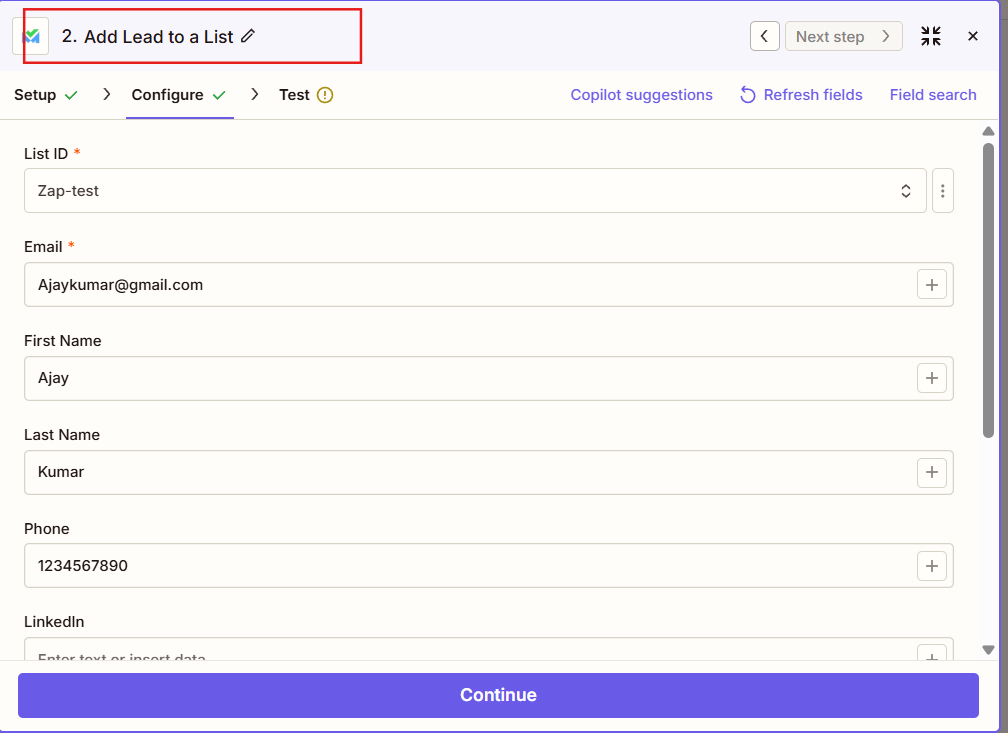
Select Add Lead to List as the action
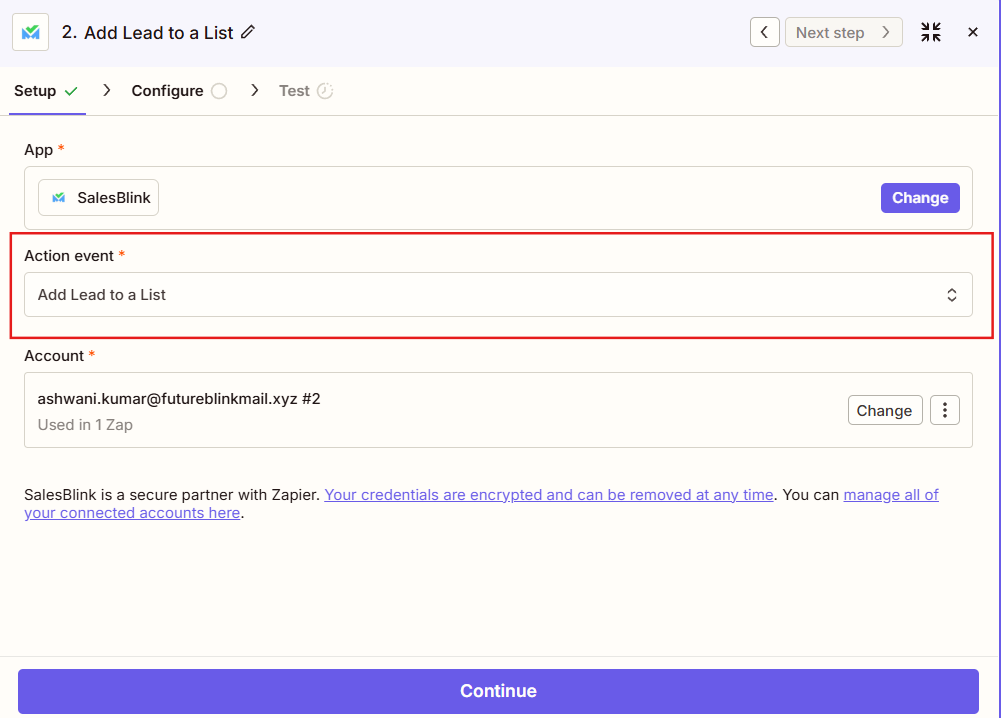
Configure Fields
- Enter the lead details:
List ID: The ID of the list to add the lead to
Email: Lead's email address (required)
First Name: Lead's first name
Last Name: Lead's last name
Phone: Lead's phone number
LinkedIn: Lead's LinkedIn profile URL
Job Title: Lead's job title
Website: Lead's company website
Company Name: Lead's company name
- Click Continue
Step 7: Test and Publish
Test
Click Test Trigger to verify the trigger works
Click Test Action to verify the action works
Publish
- Click Publish to activate your Zap
Your Zap is now live and will automatically run when the trigger event occurs!
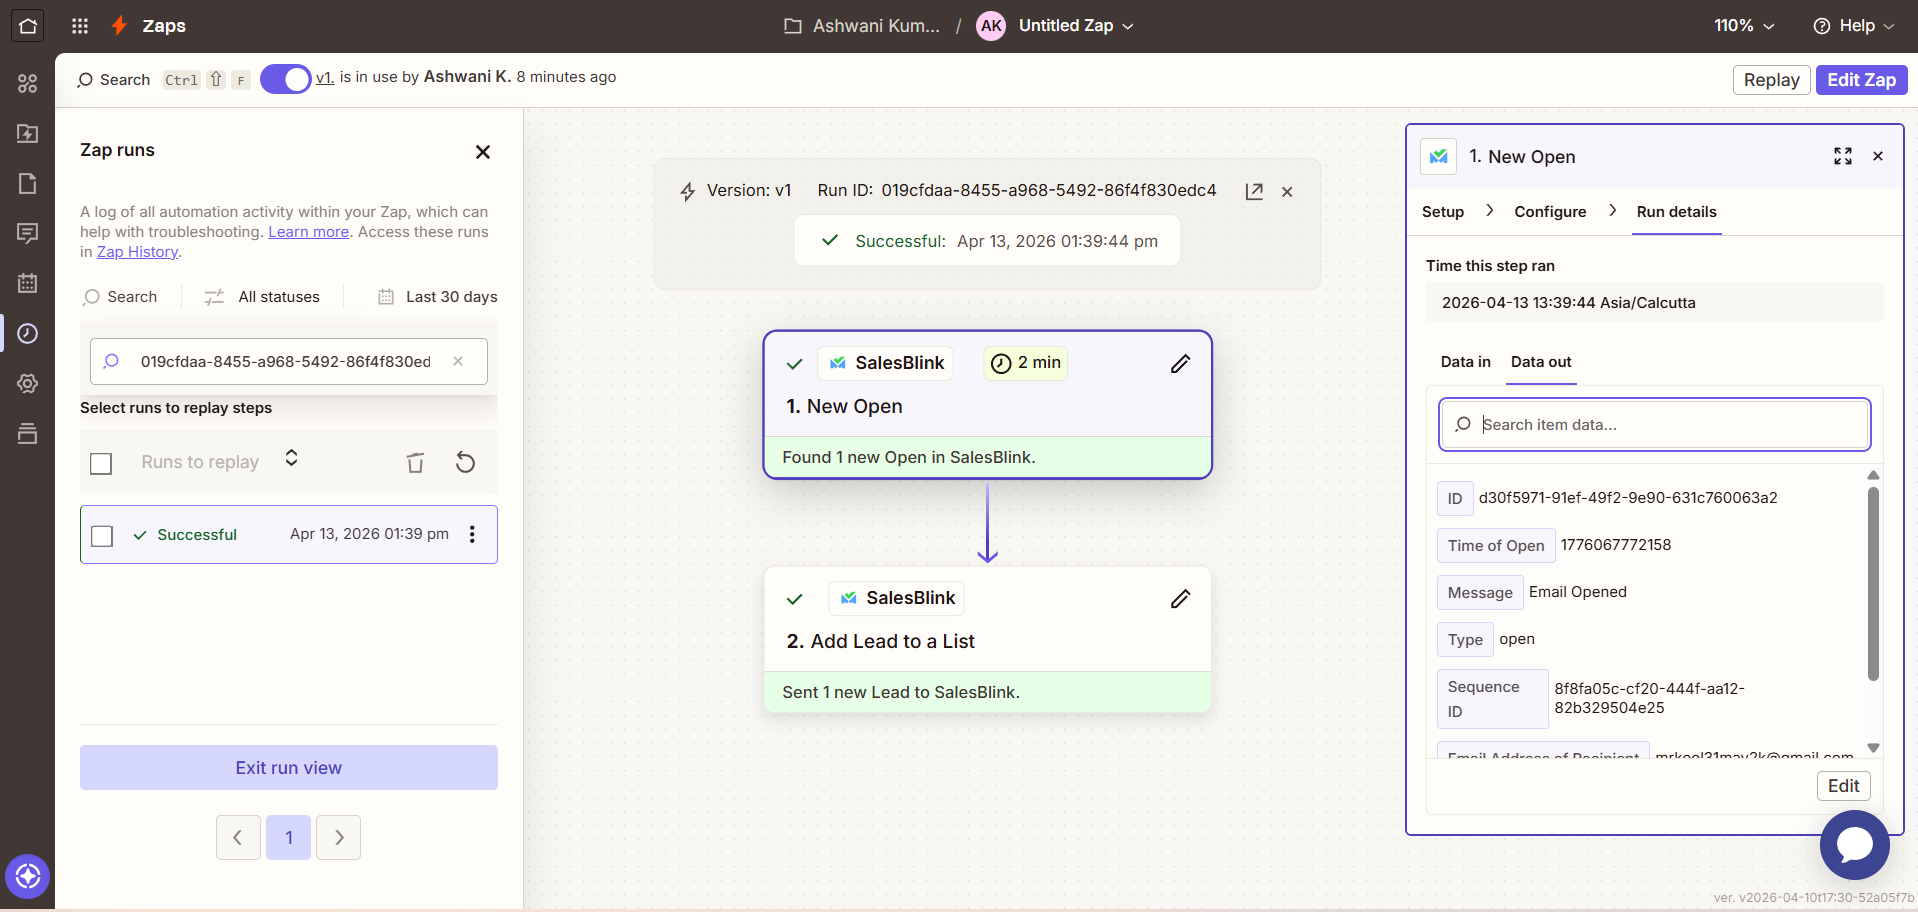
Example: When an Email is Opened
What Happens Automatically
SalesBlink detects when a recipient opens an email
Zapier triggers the configured action (e.g., add lead to a list)
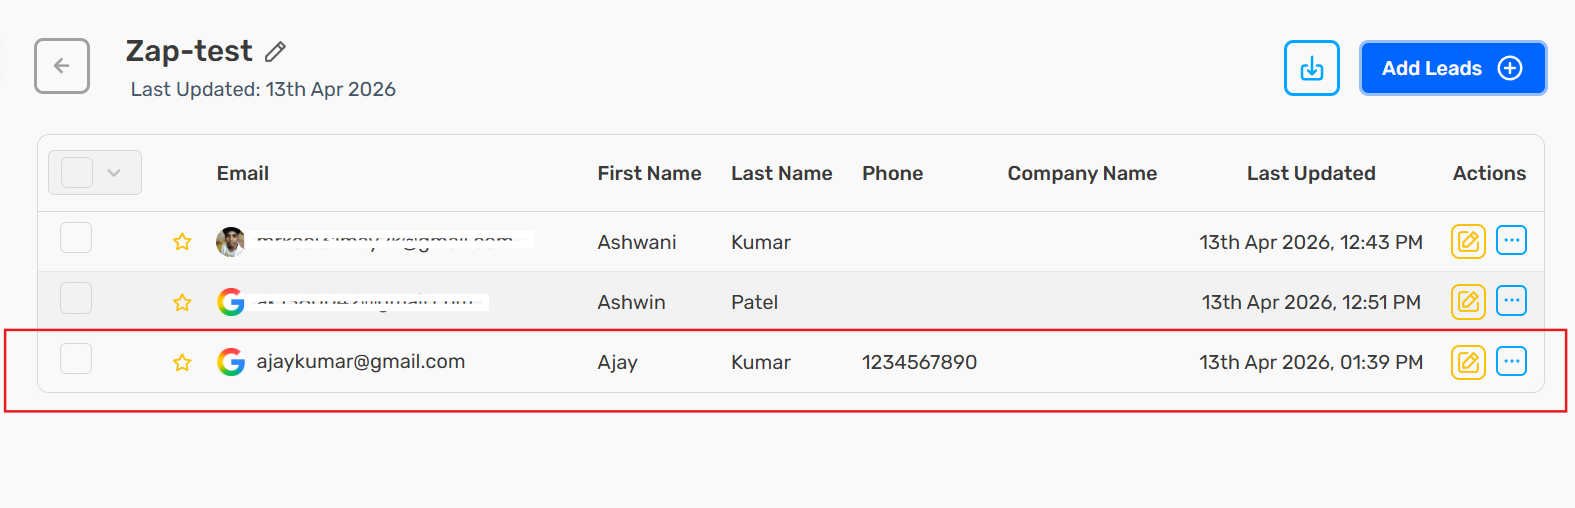
The lead is automatically added to your specified list in SalesBlink
Where to Check
In Zapier: Check the Zap history to see successful runs
In SalesBlink: Go to Outreach → Lists → Your List to see the added lead
Frequently Asked Questions
Q: How do I find my Sequence or List ID?
In SalesBlink, go to Outreach → Sequences (or Lists). The ID is visible in the URL when you open a sequence or list, or you can find it in the details section.
Q: Can I use multiple triggers in one Zap?
No, each Zap can only have one trigger. However, you can create multiple Zaps with different triggers for the same workflow.
Q: What apps can I connect with SalesBlink via Zapier?
You can connect SalesBlink with 8,000+ apps on Zapier, including Google Sheets, Slack, HubSpot, Pipedrive, Salesforce, and many more.