Overview
Connect Amazon AWS SES as an email sender with SalesBlink.
Not recommended for cold email: Amazon AWS SES is not at all ideal for cold email. AWS enforces strict sending policies, and cold outreach can lead to high complaint and bounce rates, which may get your AWS account suspended. Amazon SES is best suited for transactional and opt-in emails.
Unsubscribe link required: To comply with AWS SES rules, an unsubscribe link must always be included in every email you send through Amazon SES.
Important: Since Amazon SES only provides SMTP API, the following features will not work:
Reply tracking will not be available
Unified Inbox will not work
Email WarmUp will not work
Prerequisites
AWS account with Amazon SES access
Verified domain or email address identity in Amazon SES
Step 1: Create Amazon SES SMTP Credentials
- Log in to your AWS Account
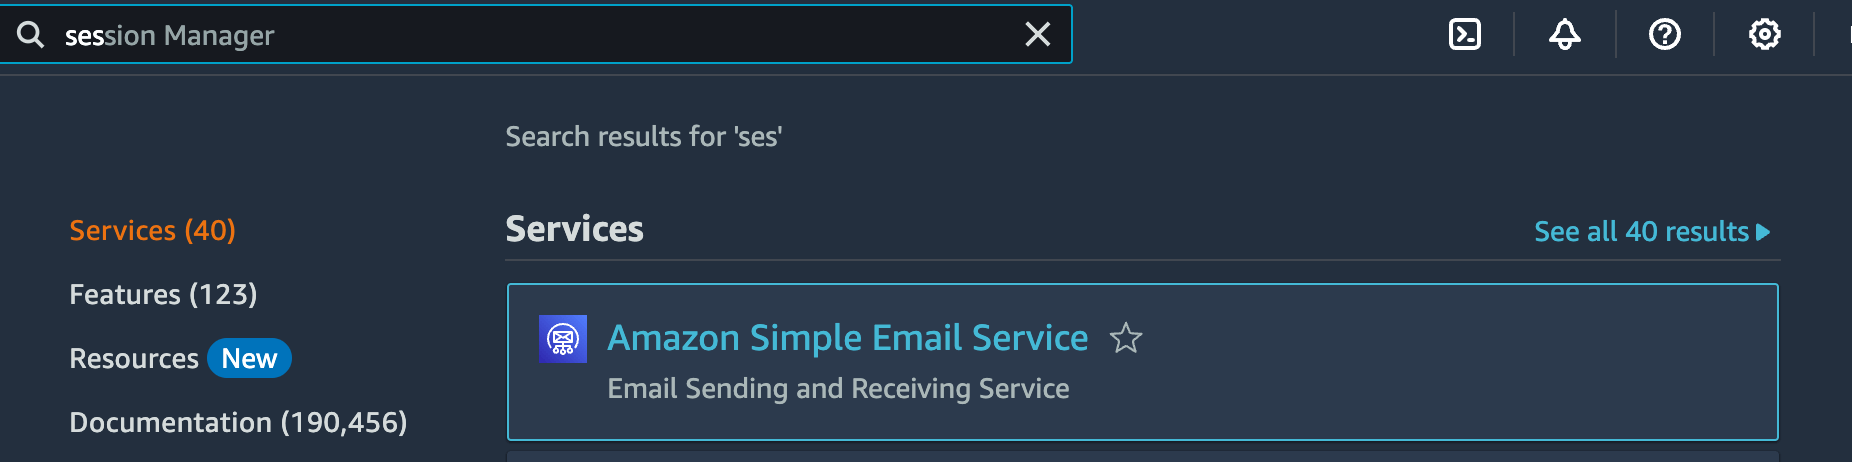
- Navigate to Amazon SES (Simple Email Service)
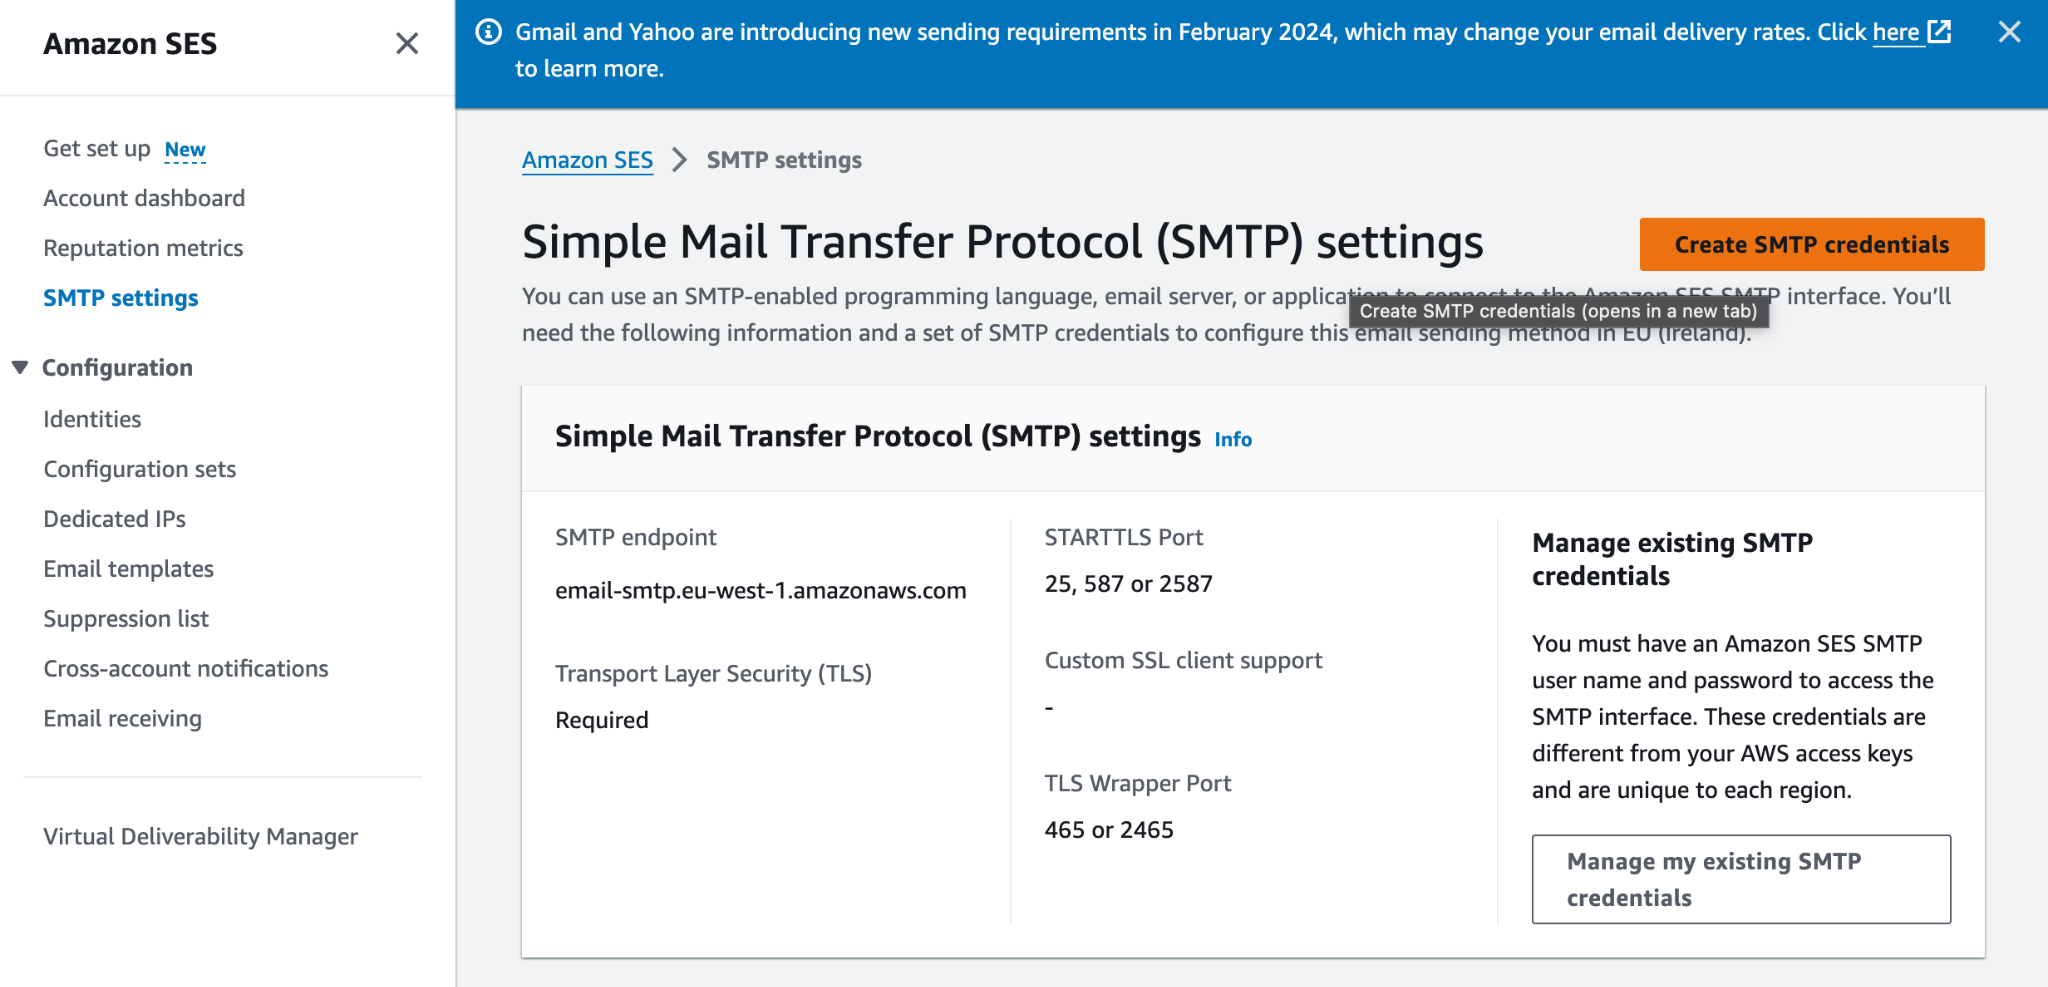
- Copy and save the SMTP Endpoint in a secure location
- Click Create SMTP credentials
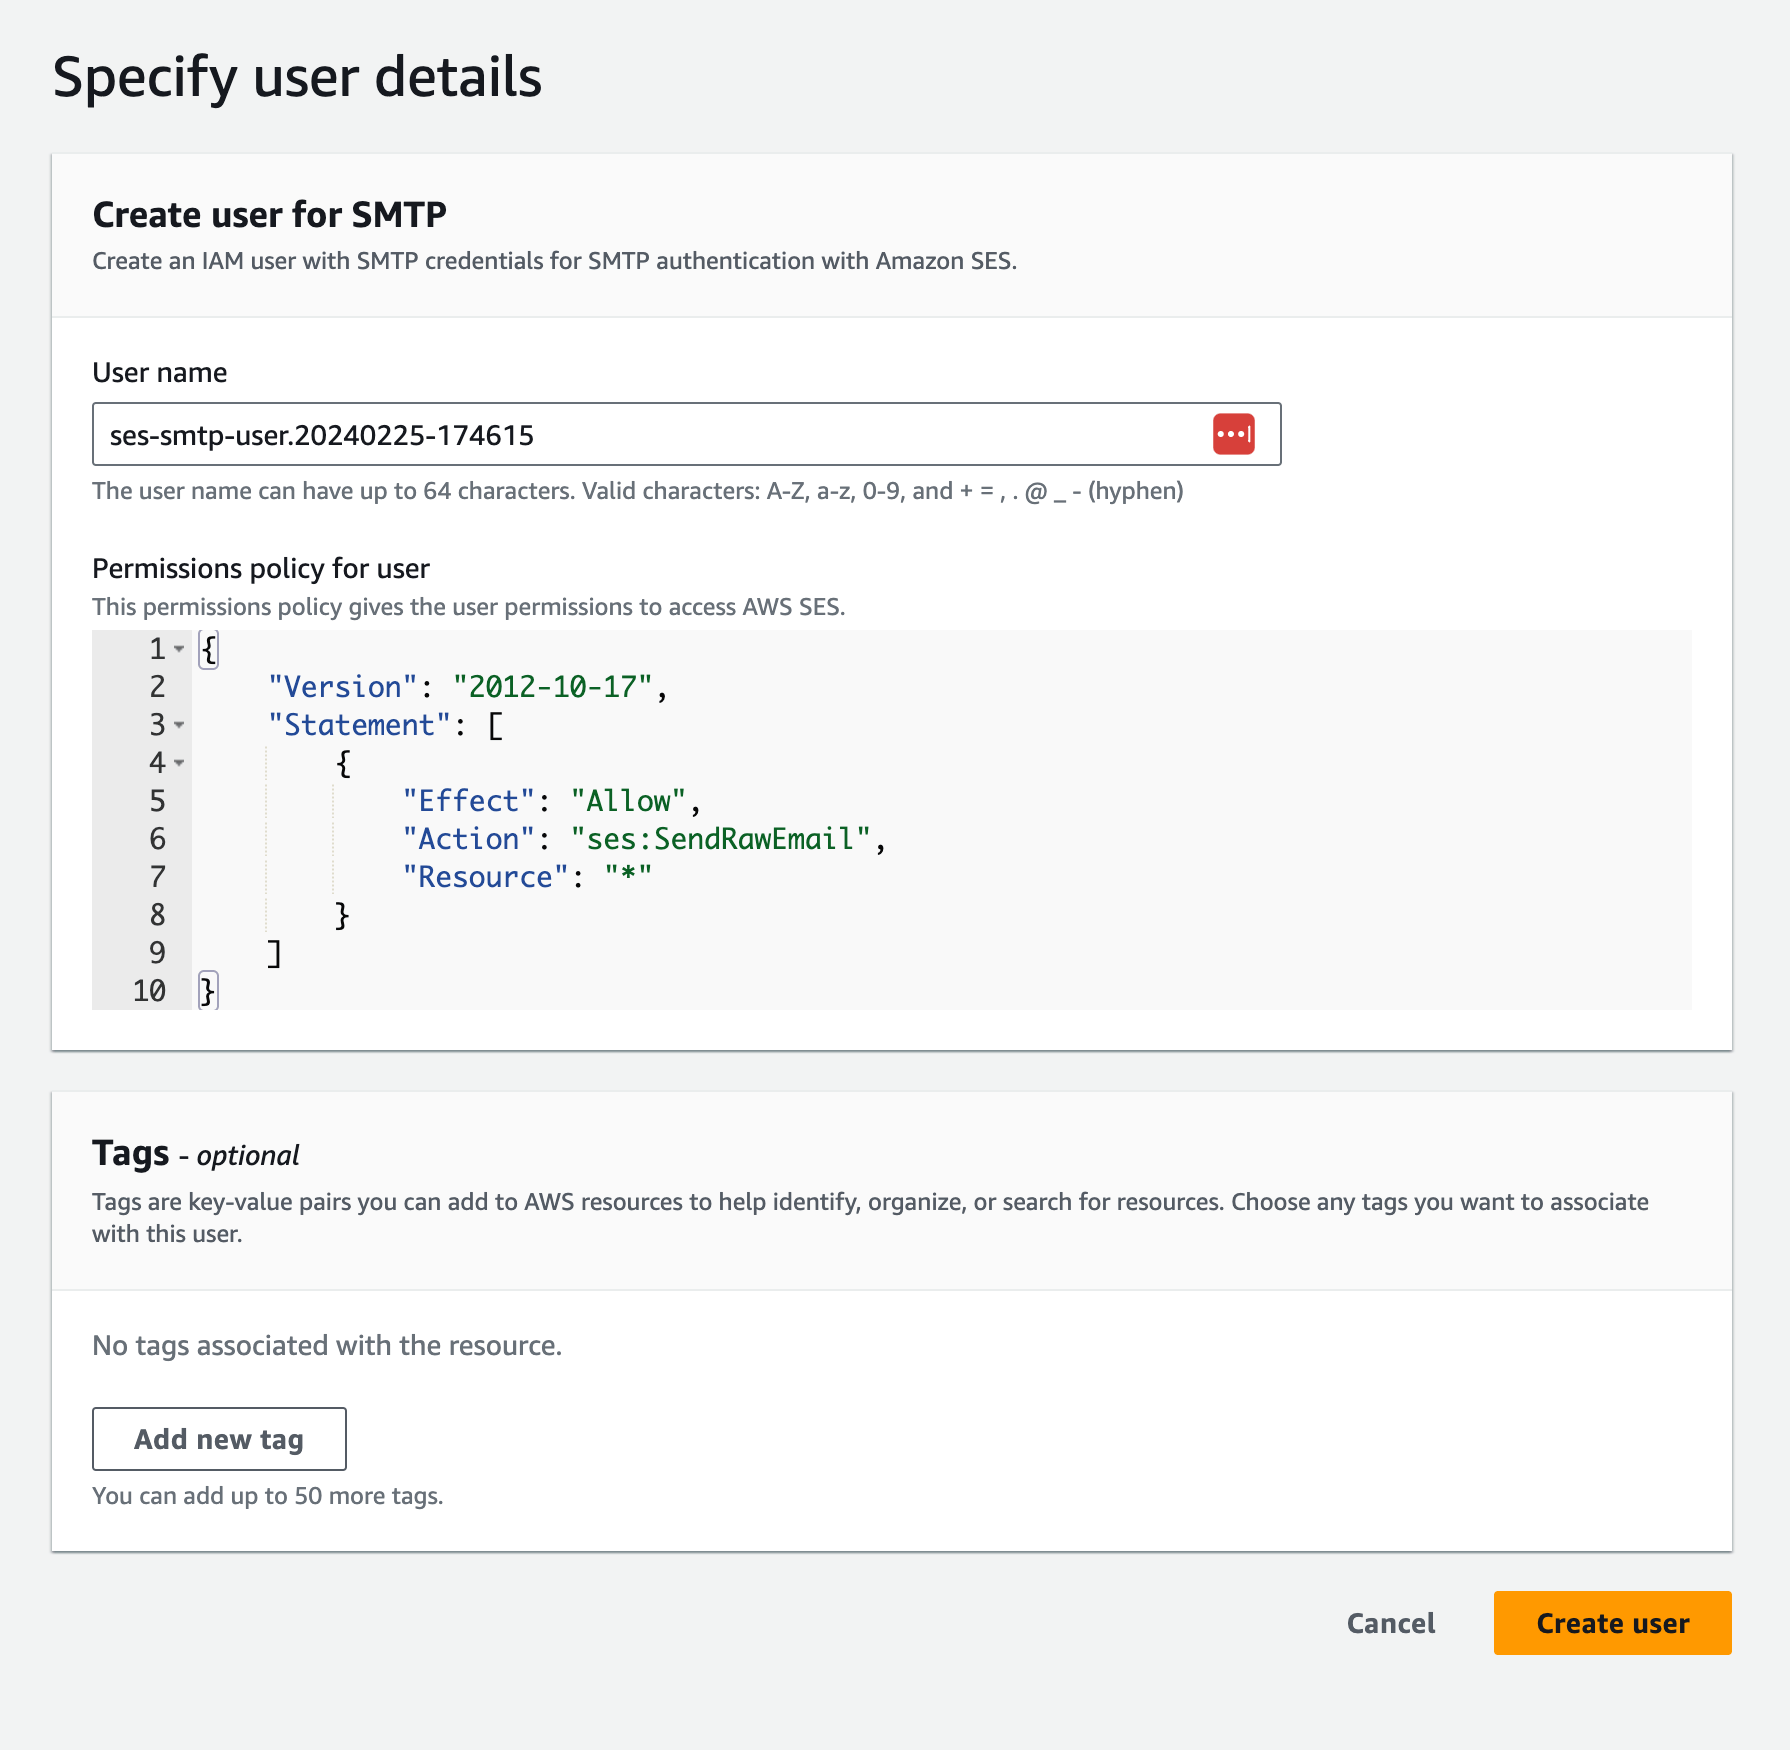
- Leave the default settings as they are and click Create User
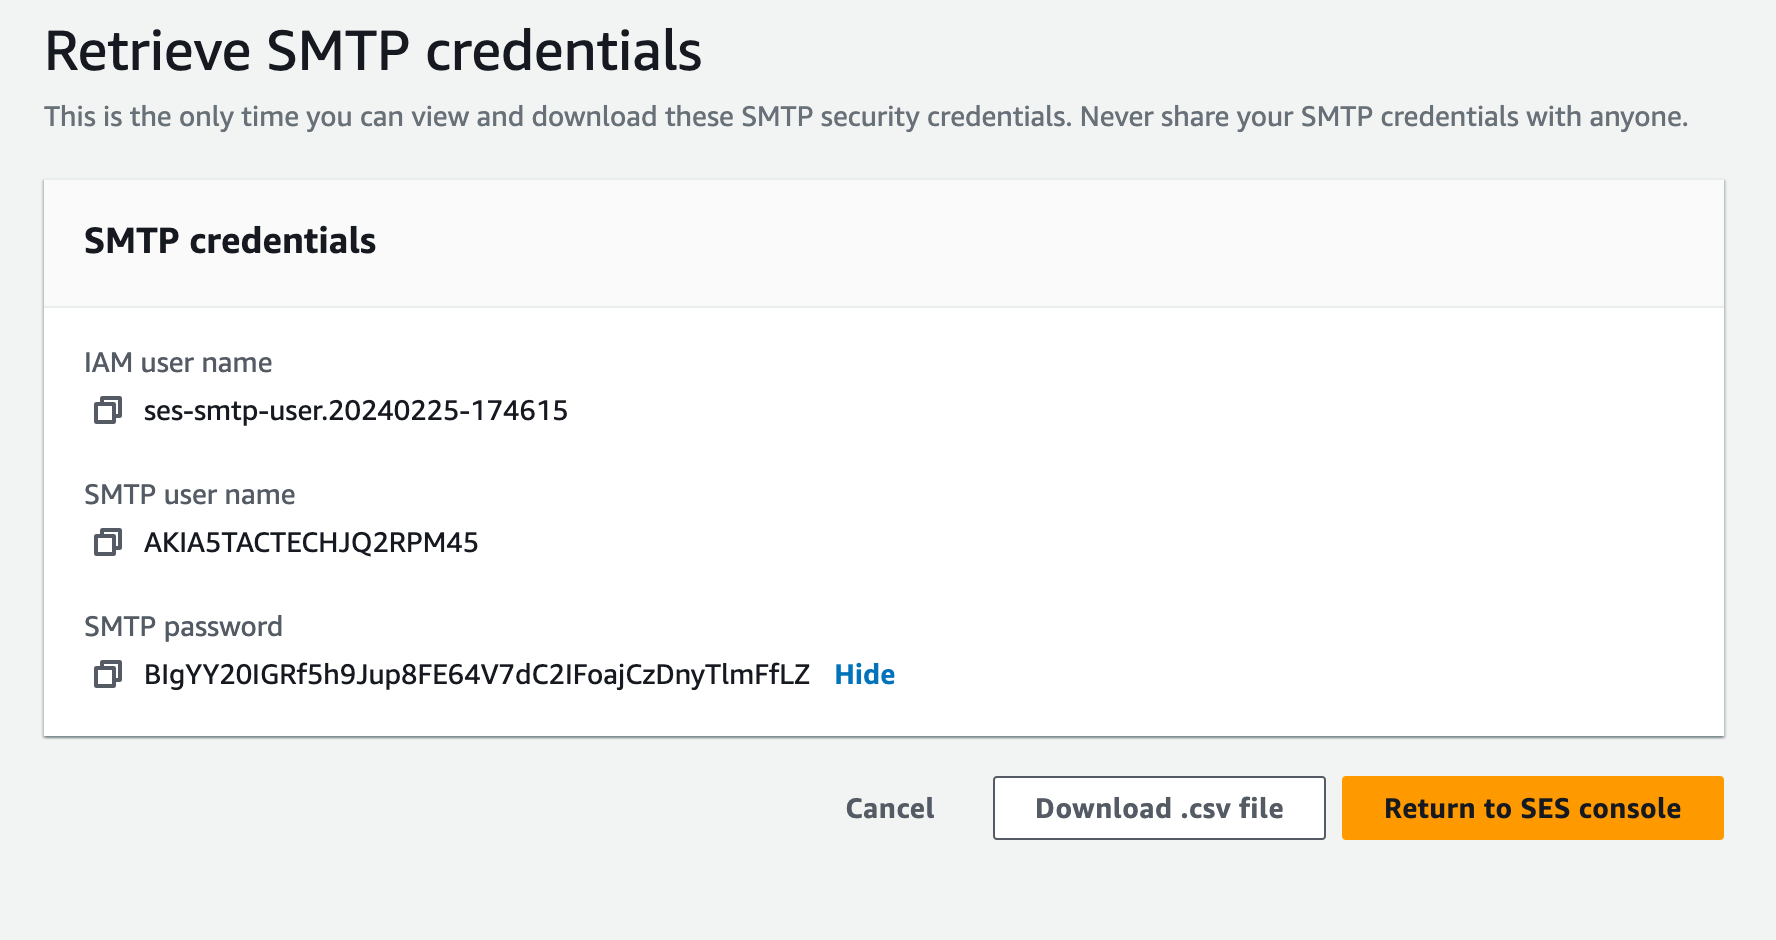
- Copy and save your SMTP user name and SMTP password in a secure location
Step 2: Connect Amazon SES to SalesBlink
Click Outreach → Email Senders
Click the Add Sender button
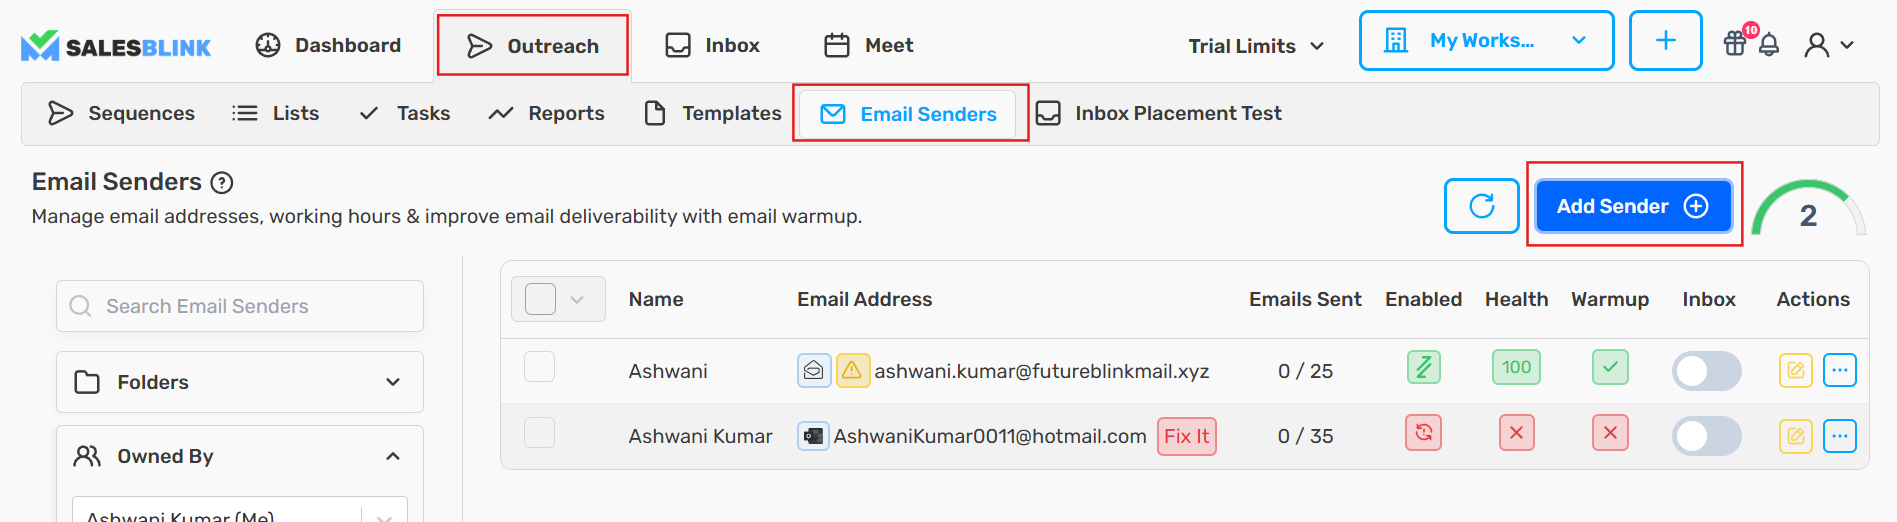
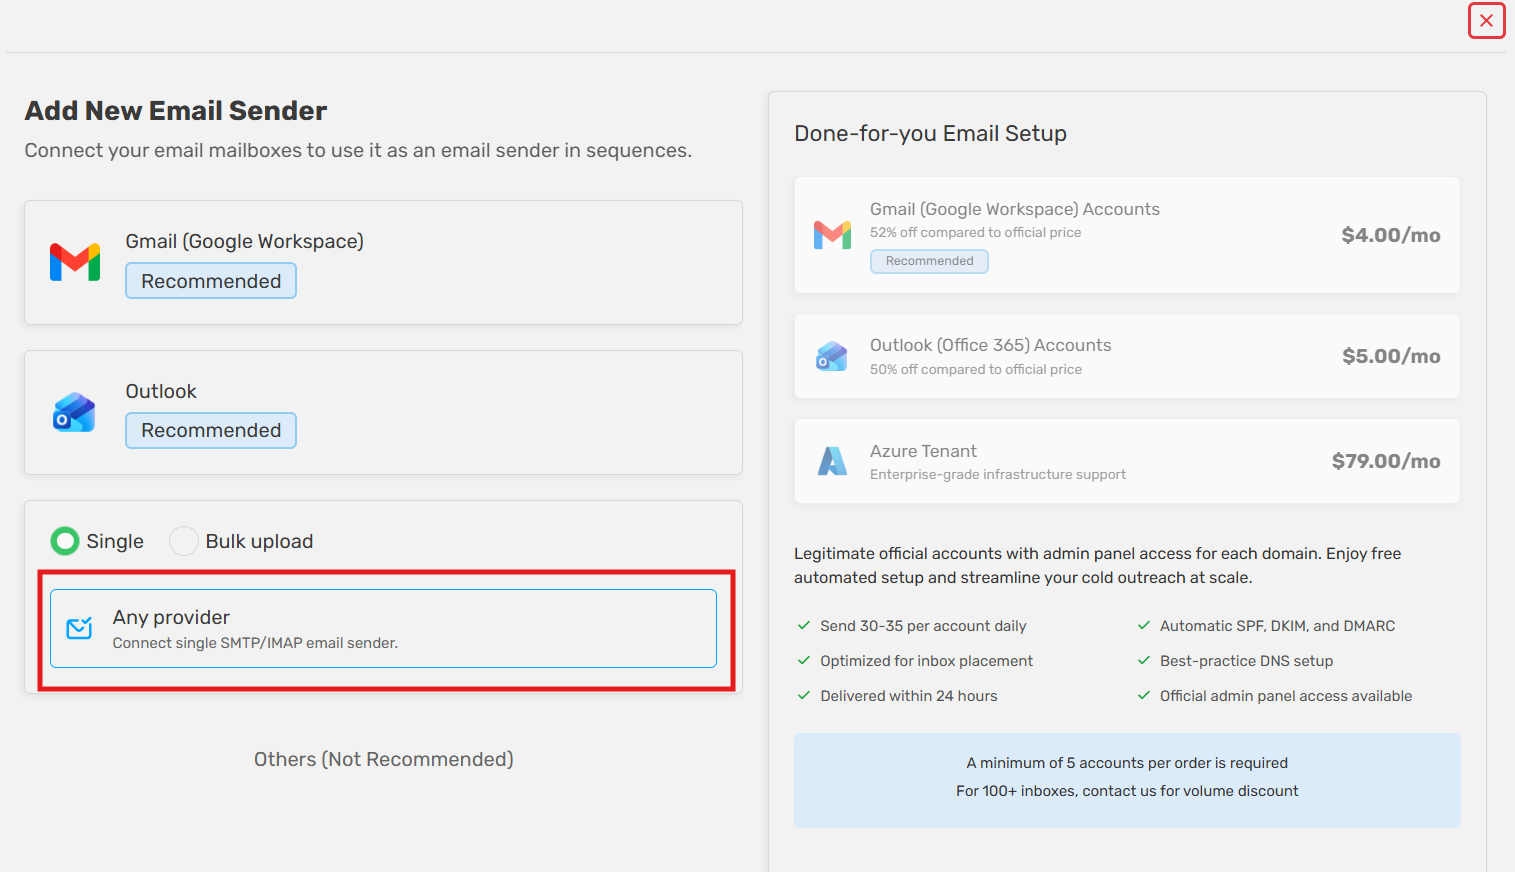
- Select SMTP from the connection options
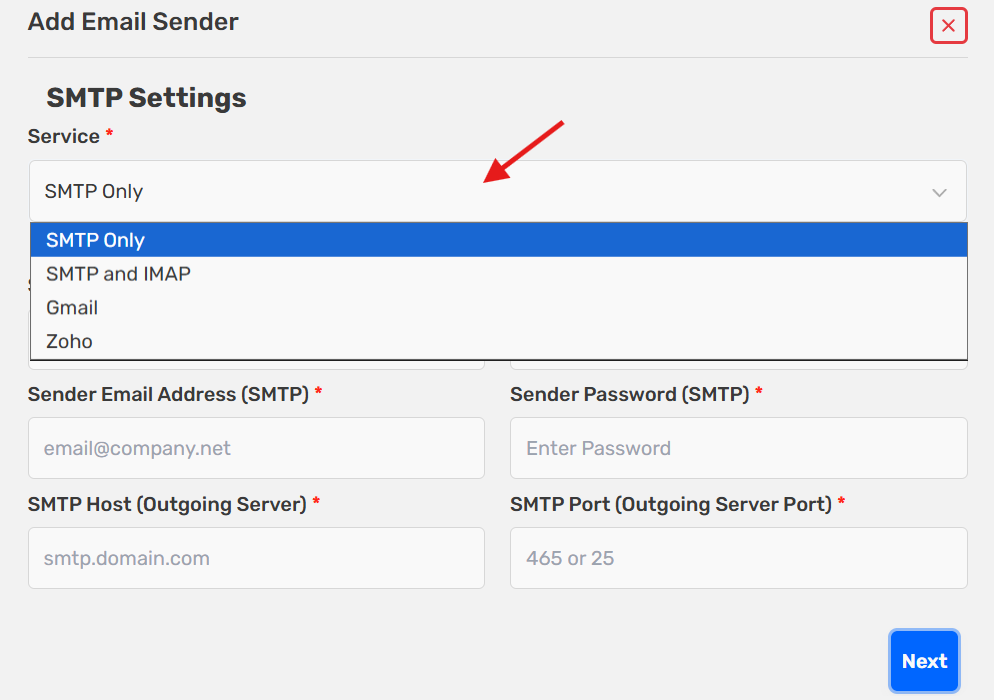
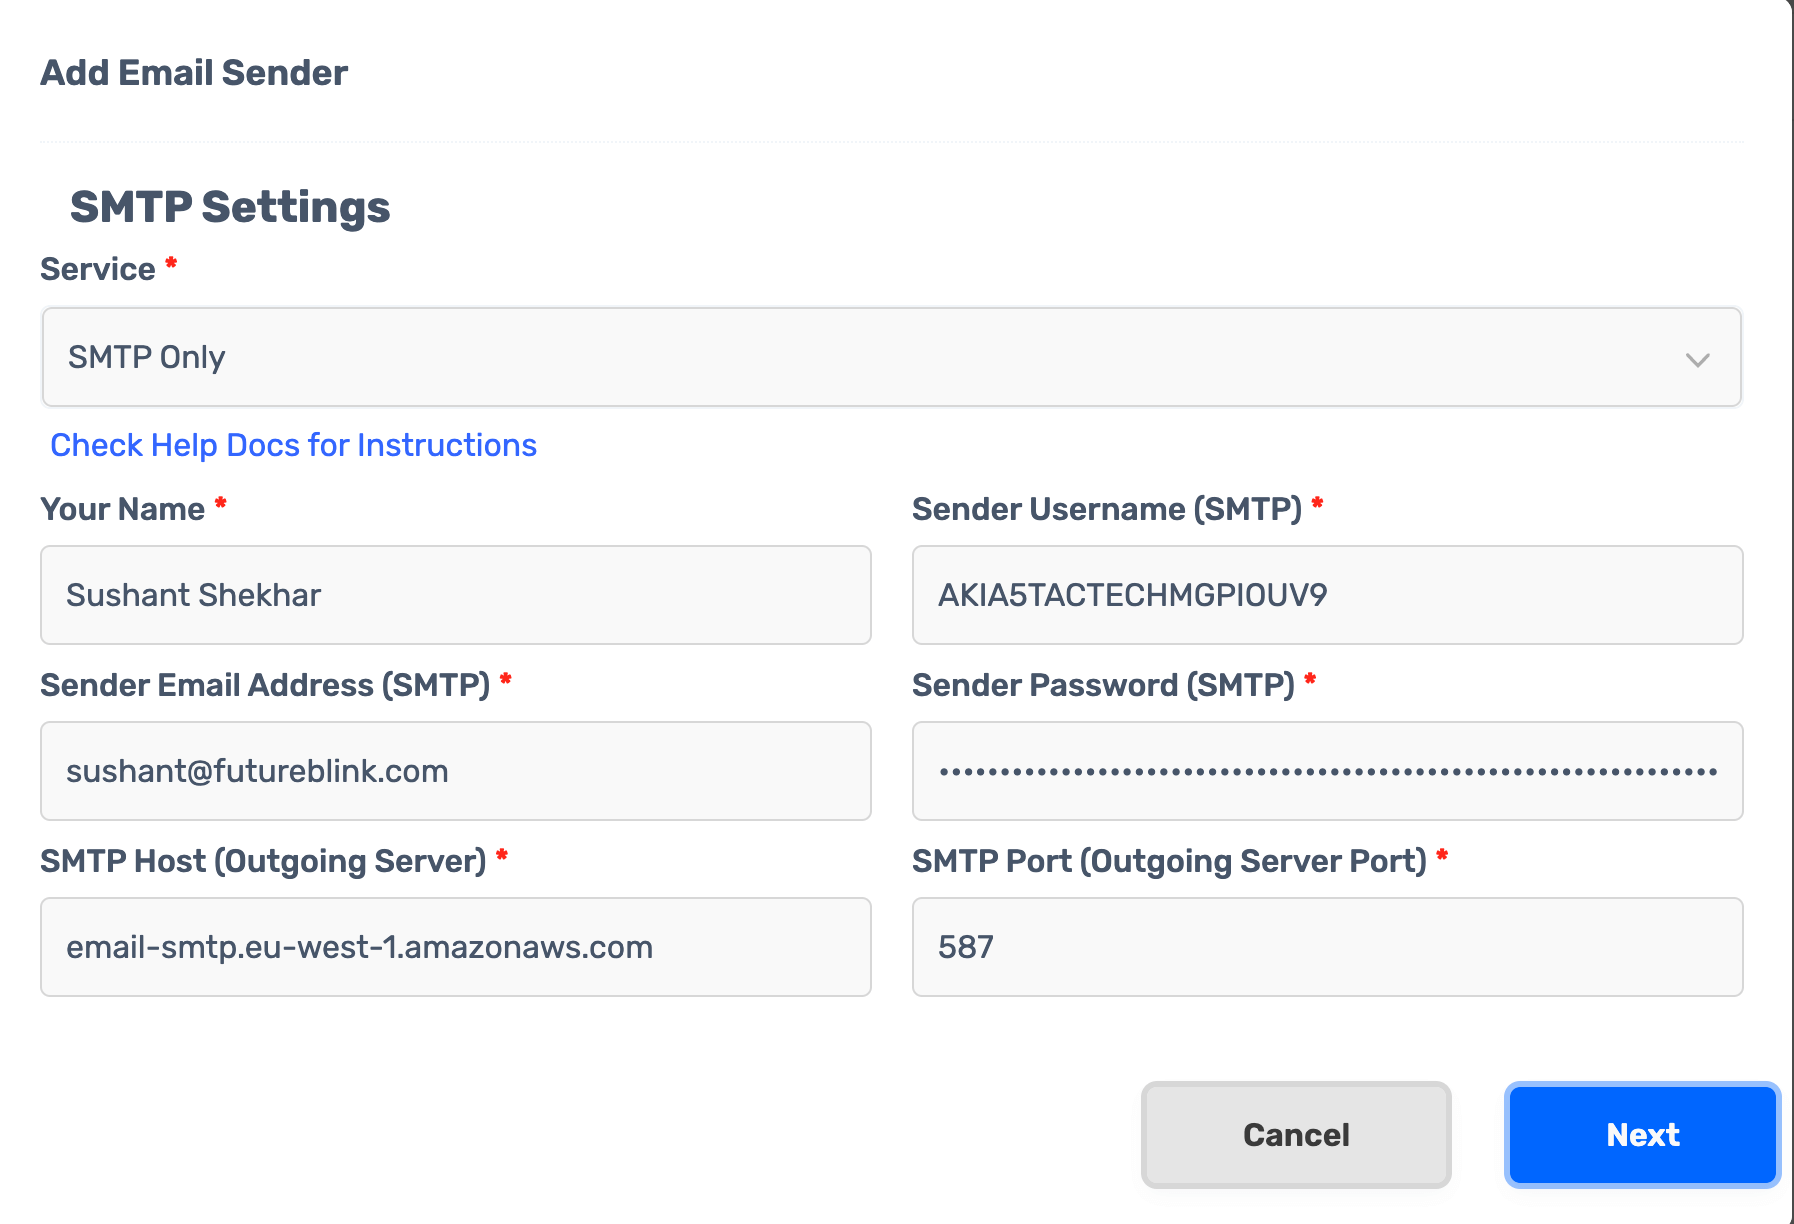
- Enter the following details:
| Field | Value |
|---|---|
| Your Name | Your name as displayed to the recipient |
| Sender Username | SMTP user name from Amazon SES |
| Sender Email Address | Your email address being connected |
| Sender Password | SMTP password from Amazon SES |
| SMTP Host | SMTP Endpoint from Amazon SES |
| SMTP Port | 587 |
- Click Next to complete the connection
Optional Settings
Step 3: Launch Your Email Sequence
Your Amazon SES email address is now ready to use. You can create sequences using:
Remember: an unsubscribe link must always be included in your emails to comply with AWS SES rules.
Common Errors and Troubleshooting
Ensure your domain or email address identity is verified in Amazon SES
Double-check your Sender Username and Sender Password are correct
Verify your SMTP Endpoint and Port (587) are entered correctly
Frequently Asked Questions
Q: How many emails can I send using Amazon SES?
In sandbox accounts, you cannot send more than 100 emails. Ensure to increase your sending quotas by requesting a limit increase from AWS.